> For the complete documentation index, see [llms.txt](https://docs.solutioo.de/llms.txt). Markdown versions of documentation pages are available by appending `.md` to page URLs; this page is available as [Markdown](https://docs.solutioo.de/shopware/shopware6_en_us/configuration/authentication-to-the-online-shop.md).
# Authentication to the Online Shop
Here you will find all the information you need for the initial setup of the Shopware API Connector.
## 1. Initial Setup
As soon as the Shopware 6 API Connector is installed on your Business Central system, the connection to the online shop can be established.
You will notice that a new tab has been added to Business Central. When you select the *"Shopware"* tab, a submenu opens:
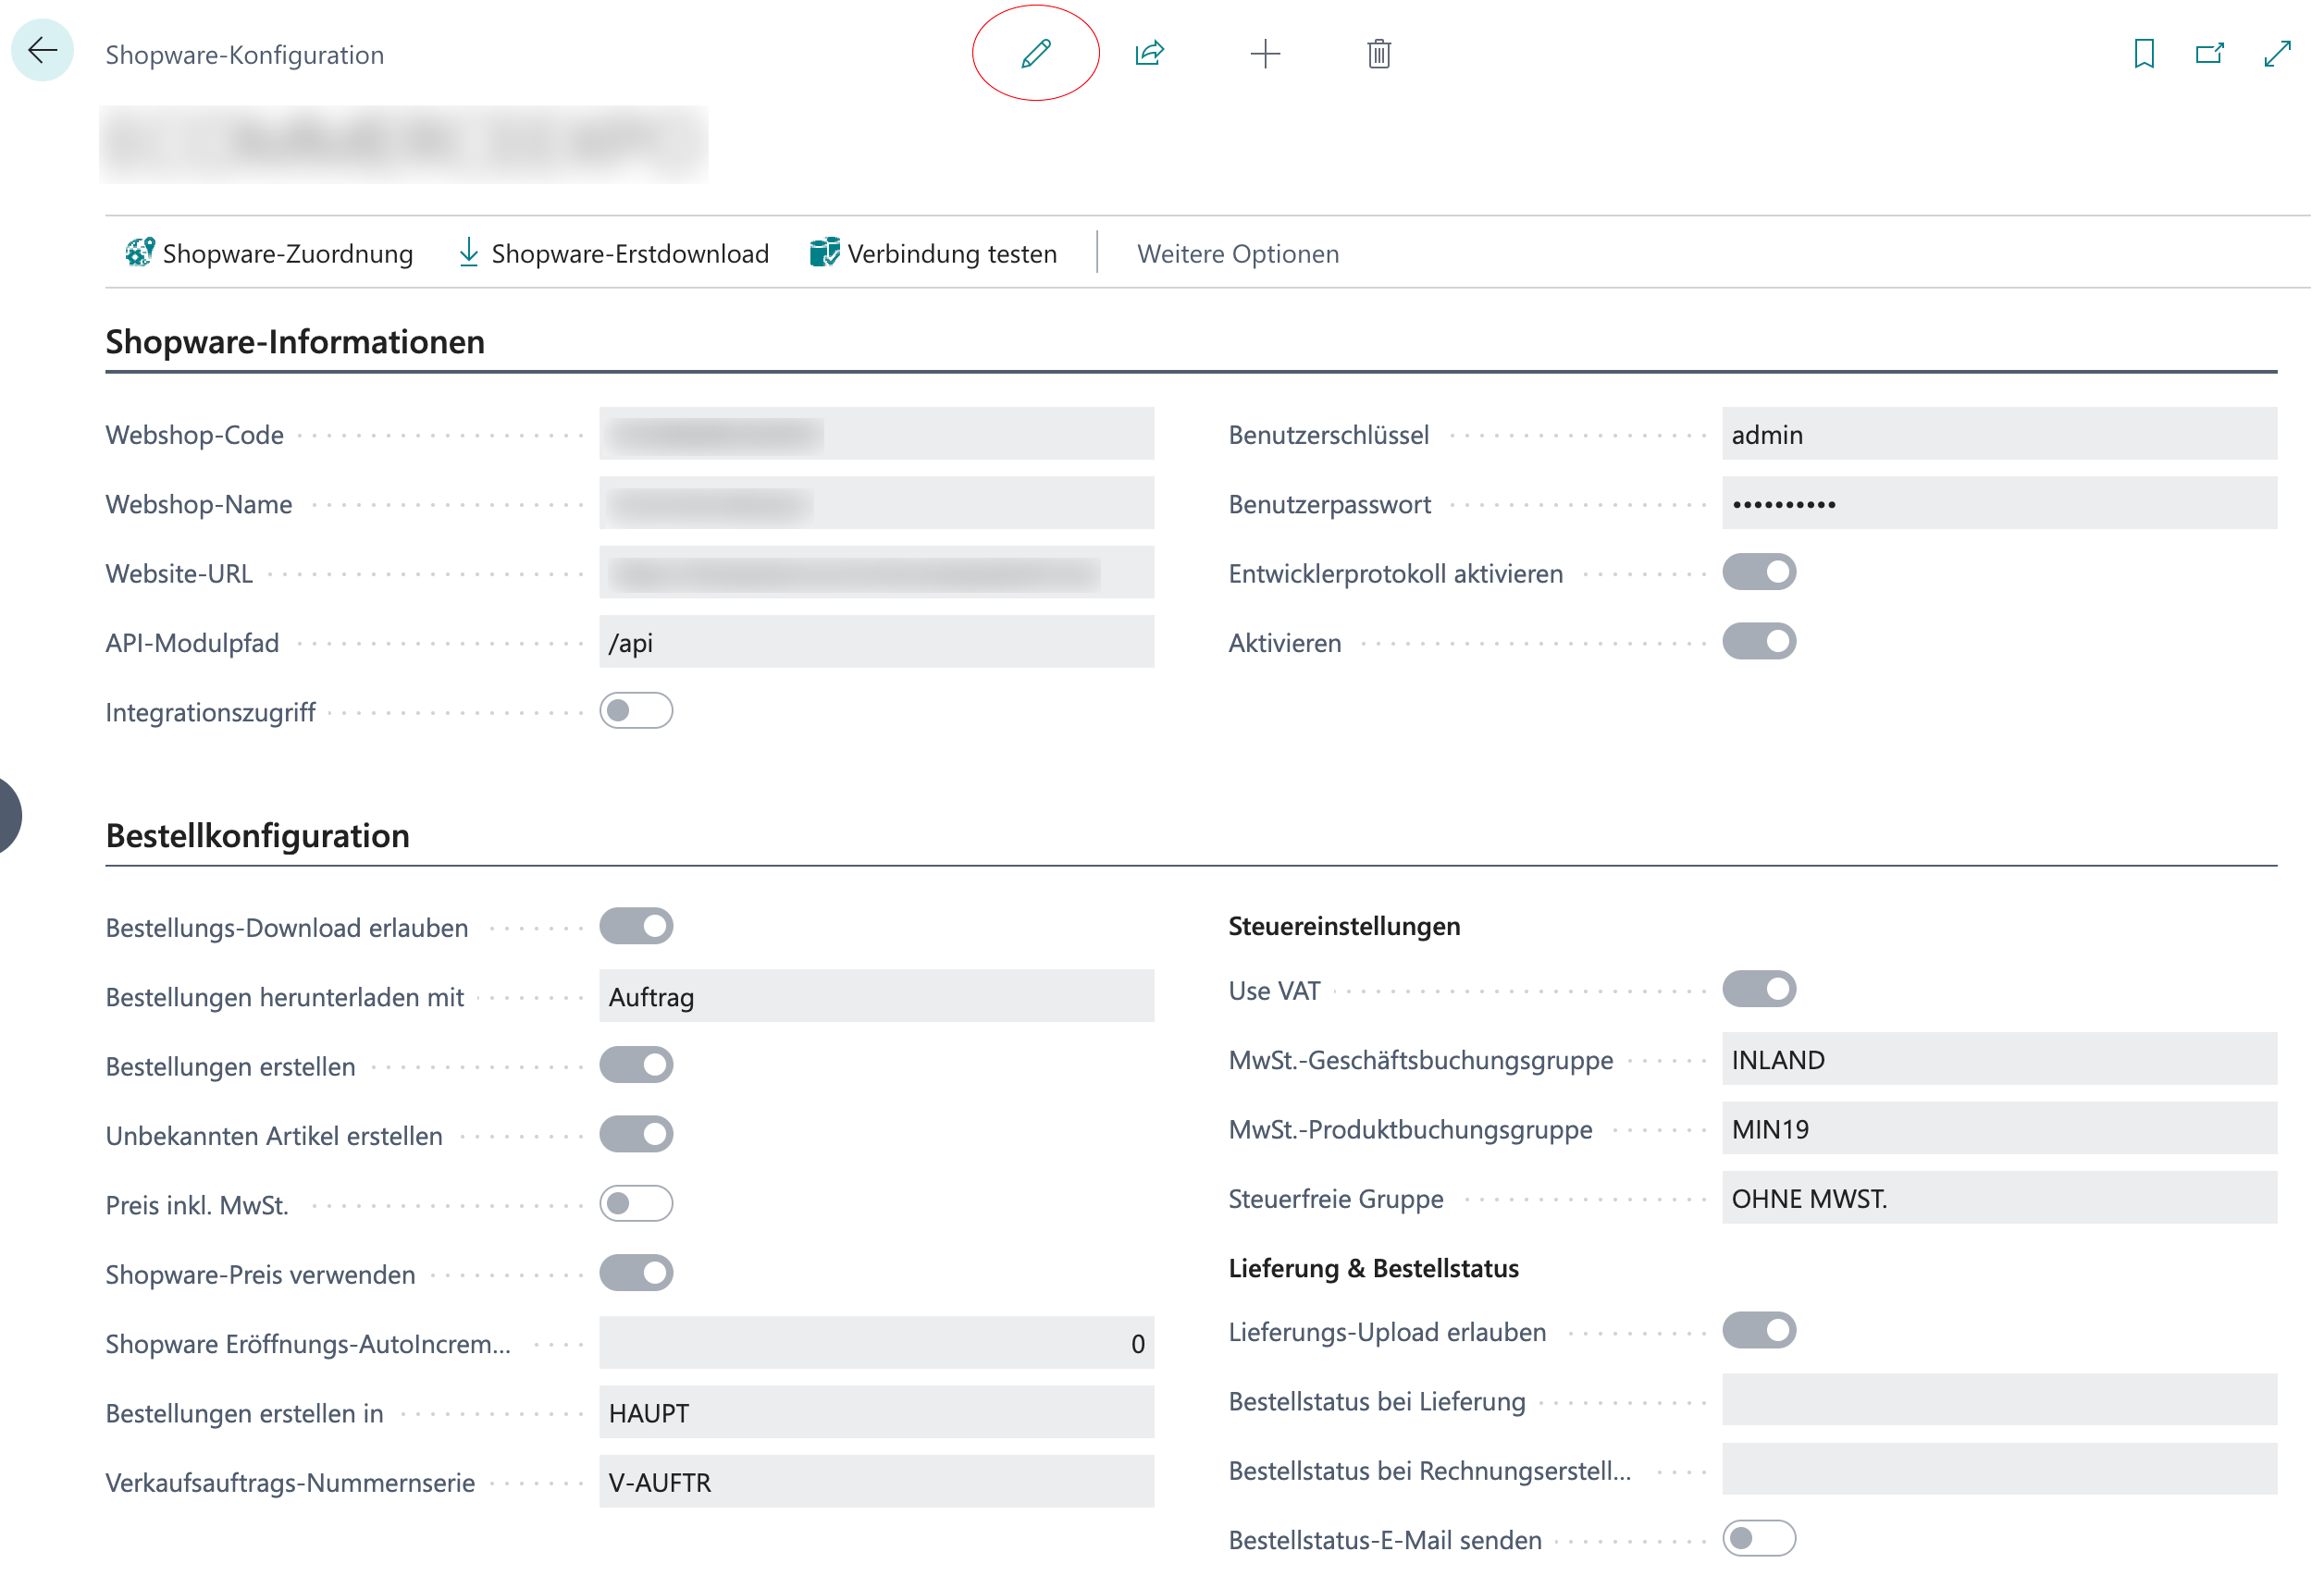
After you select the *"Configuration"* tab, the menu opens in which you can both establish the connection to Shopware and define many additional settings.\
To edit them, you must switch to *edit mode*, which you will find at the top center of the window (the pencil icon):
You can then edit all settings.
#### 1.1 Initial Configuration
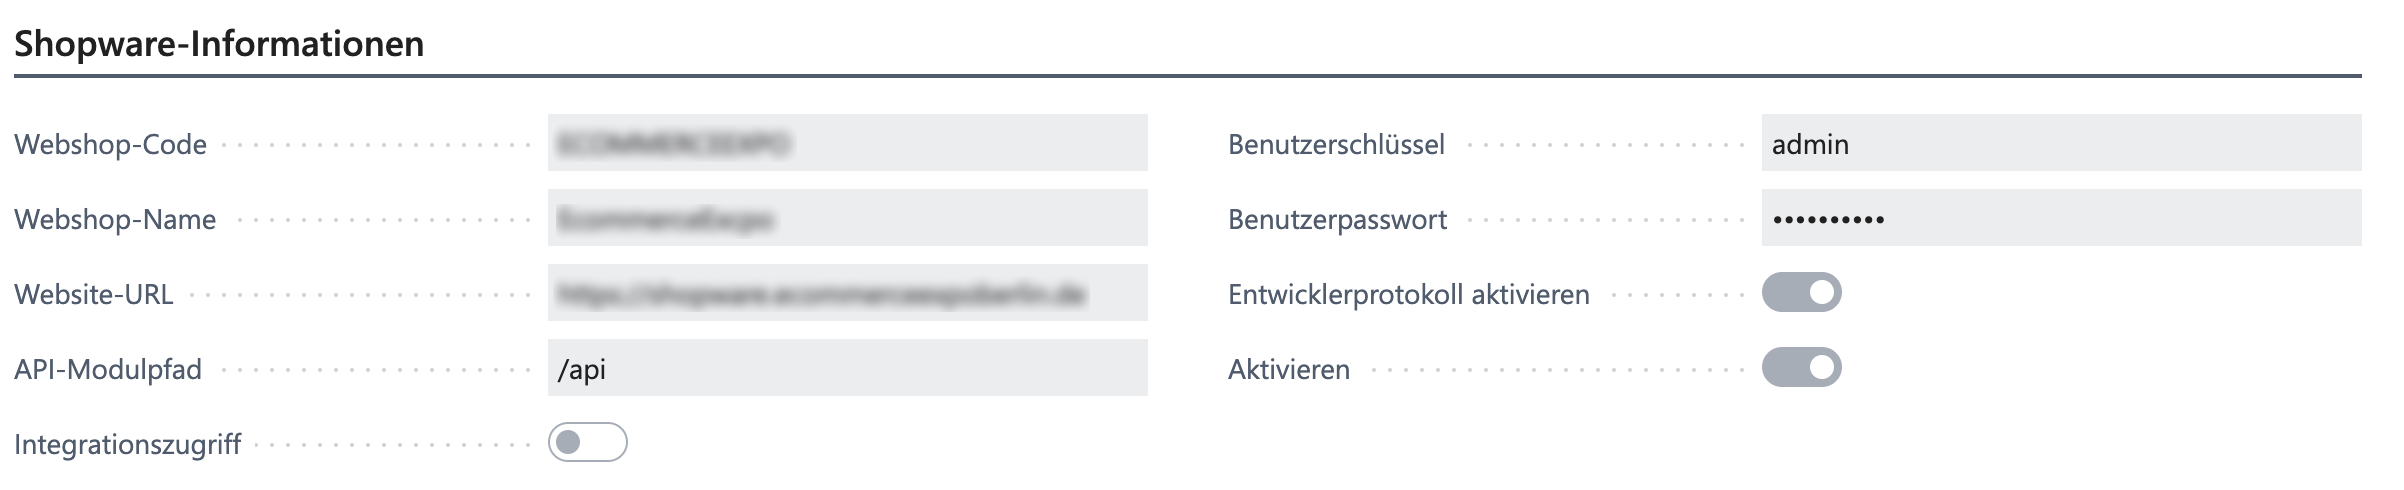
The following information, which you will find under *"Shopware Information"*, is required for the initial setup:
* **Web Shop Code**\
A code used internally by Business Central that uniquely identifies your shop.
* **Web Shop Name**\
A descriptive name for your online shop.
* **Website URL**\
The URL of your Shopware shop, including https\://
* **API Module Path**\
As a rule, the path ends in /api
* **Integration Access**\
Here you define how the connection between Business Central and Shopware is established.\
**YES** :right: A *"Shopware Access Key ID"* and a *"Shopware Secret Access Key"* are required.\
**NO** :right: You need a *"Shopware User Name"* as well as the corresponding *"Shopware User Password"* with administrator permissions.
* **Enable Developer Log**\
**YES** :right: Only required if errors occur during *sync*, for example because data does not reach the shop or arrives incorrectly. The developer log shows exactly which API calls are made and where errors occur.
* **Enable**\
Determines whether the shop is active (*YES*) or not (*NO*). This setting is particularly relevant for multi-shop scenarios (COMING SOON).
{% hint style="info" %}
If you would like to use the integration access instead of a user name and password, you can create it in the Shopware back end:
*Settings* :right: *Users & permissions* :right: select an administrator :right: create a new access key under "*Integrations*".
{% endhint %}
#### 1.2 Establishing the Connection
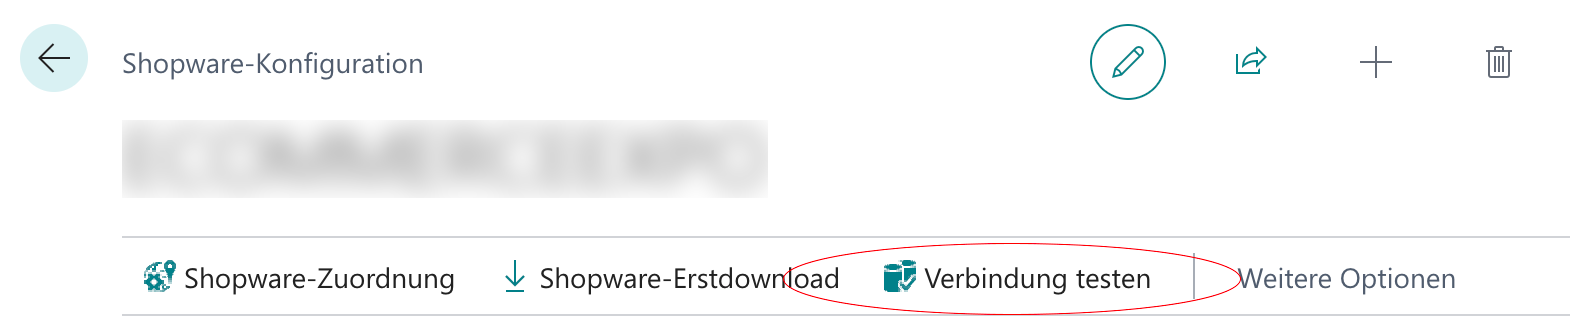
You can then run a connection test. Click "Test Connection". If all data has been entered correctly, a success message appears.
If an **error message** appears, there can be several causes.
* Check whether all fields have been filled in correctly.
* Try a different Shopware administrator user or a different version of the *"Integration Access".*
* Check whether your server permits the connection. Special server configurations are a common cause of failed connections between Business Central and Shopware.
* If your shop is still under development, make sure that no password protection is active.
## 2. Initial Download
The initial download transfers all relevant data from Shopware to Business Central and is required in order to map the values between the two systems correctly.
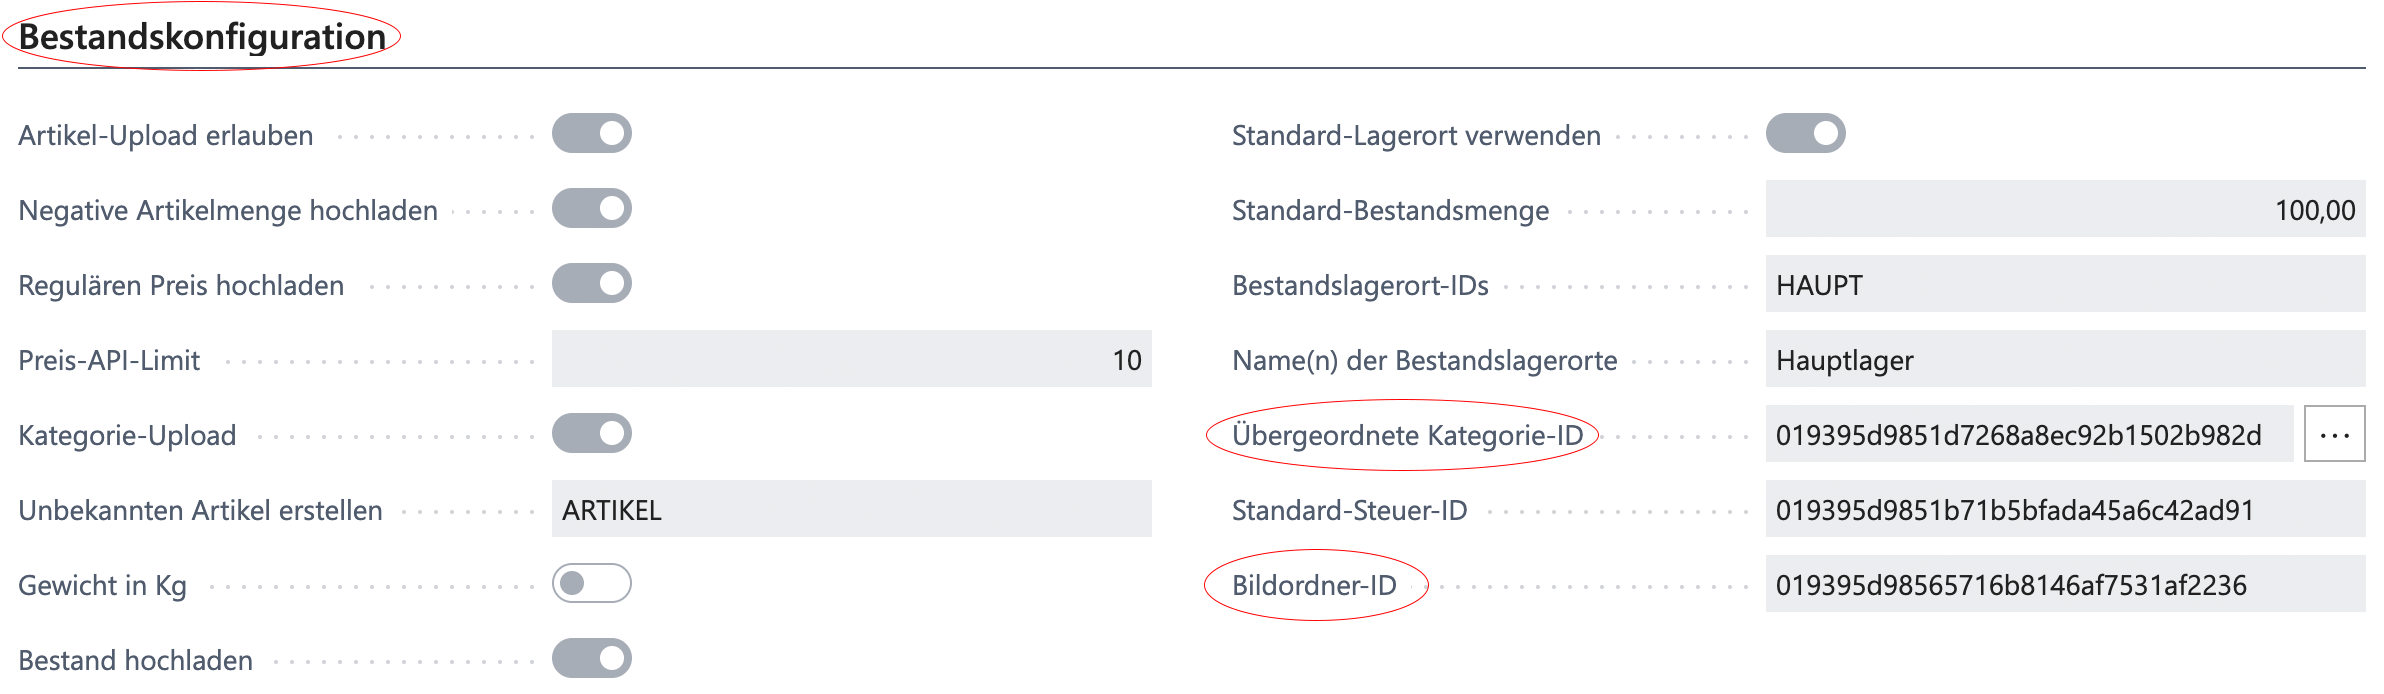
You are still in the Shopware configuration. Before the initial download is possible, two important values must be filled in. You will find them under *"Inventory Configuration"*:
* Parent Category ID
* Image Folder ID
#### 2.1 Parent Category ID
The *"**Parent Category ID"* determines which categories are imported from Shopware and where newly created categories are added. You will find the ID in Shopware.\
To do so, switch to the **back end of your Shopware shop**.
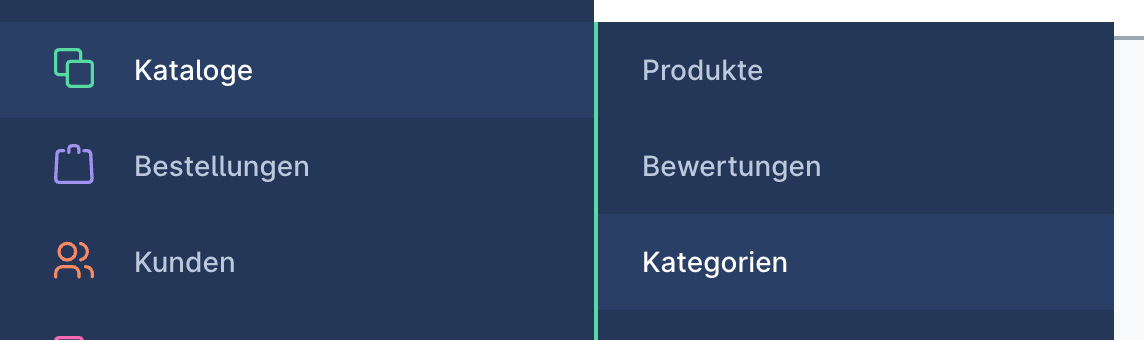
Under the "***Catalogues"*** :right: ***"Categories"*** tab, select the category that you want to define as the parent category. As a rule, this is the top level, or "Home".
Select this category.
In the URL you will now find a long ID consisting of letters and numbers between two slashes. Copy it and paste this ID into Business Central.
#### 2.2 Image Folder ID
Proceed in a similar way for the *"Image Folder ID"*. First switch to the **back end of your Shopware shop**.
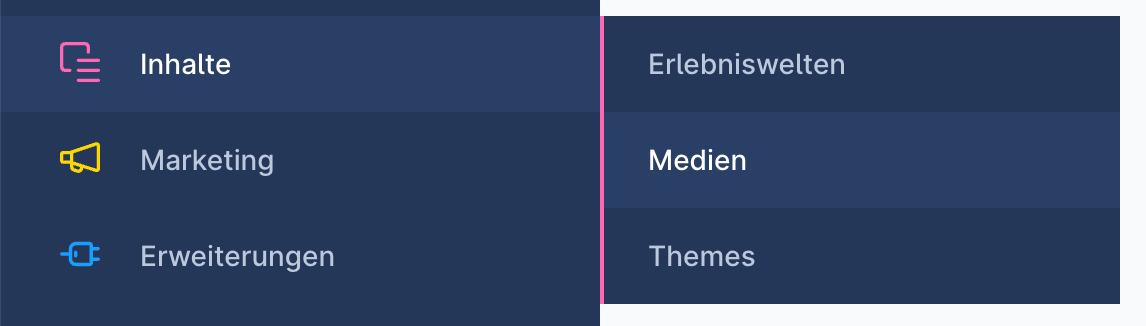
Under the *"Content"* :right: *"Media"* tab, select the folder in which the product images are to be stored. As a rule, this is the "*Product Media*" folder.
In the URL you will now find a long ID consisting of letters and numbers between two slashes. Copy it and paste this ID into Business Central.
#### 2.3 Starting the Initial Download
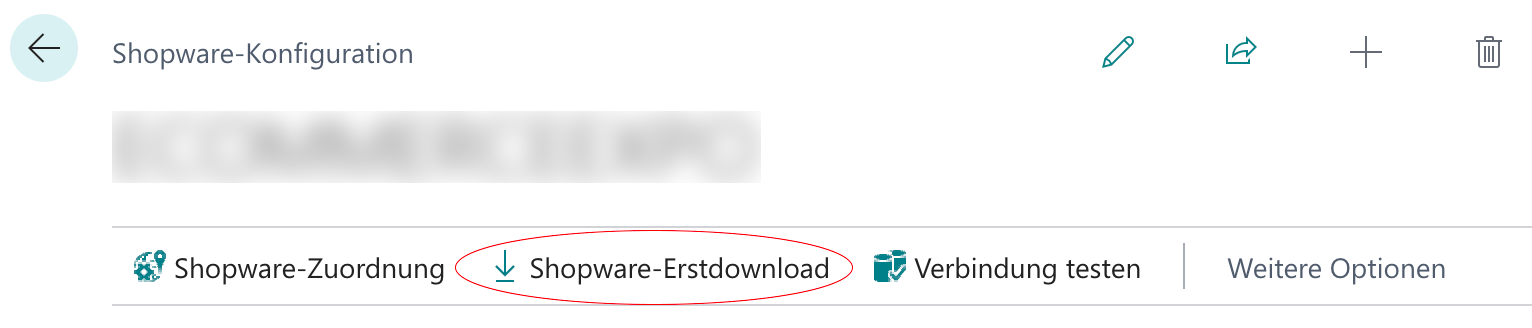
Everything is now prepared for the initial download. Scroll back up, still in the "Shopware Configuration". There you will find the *"Shopware Initial Download"* tab, which you use to start it.
---
# Agent Instructions
This documentation is published with GitBook. GitBook is the documentation platform designed so that both humans and AI agents can read, navigate, and reason over technical content effectively. Learn more at gitbook.com.
## Querying This Documentation
If you need additional information that is not directly available in this page, you can query the documentation by asking a question.
Perform an HTTP GET request on the following URL with the `ask` and `goal` query parameters:
```
GET https://docs.solutioo.de/shopware/shopware6_en_us/configuration/authentication-to-the-online-shop.md?ask=&goal=
```
`ask` is the immediate question: it should be specific, self-contained, and written in natural language.
`goal` is what the user is ultimately trying to achieve, the reason they need the answer. Sharing it helps GitBook give you a better, more relevant answer. A goal is most helpful when it describes the outcome the user wants rather than restating the question. For example, with `ask=how do I create an API token`, a goal like `automate deployments from our CI pipeline` lets GitBook tailor the answer to that use case.
The response will contain a direct answer to the question and relevant excerpts and sources from the documentation.
Use this mechanism when the answer is not explicitly present in the current page, you need clarification or additional context, or you want to retrieve related documentation sections.