> For the complete documentation index, see [llms.txt](https://docs.solutioo.de/llms.txt). Markdown versions of documentation pages are available by appending `.md` to page URLs; this page is available as [Markdown](https://docs.solutioo.de/shopware/shopware6_en_us/order-processing/order-handling-in-bc.md).
# Order Handling in BC
Learn how to process imported orders in Business Central.
After the import, Shopware orders are created as **sales orders** in Business Central, where you can process them.
## 1. Imported Orders
### 1.1 Finding an Order
{% stepper %}
{% step %}
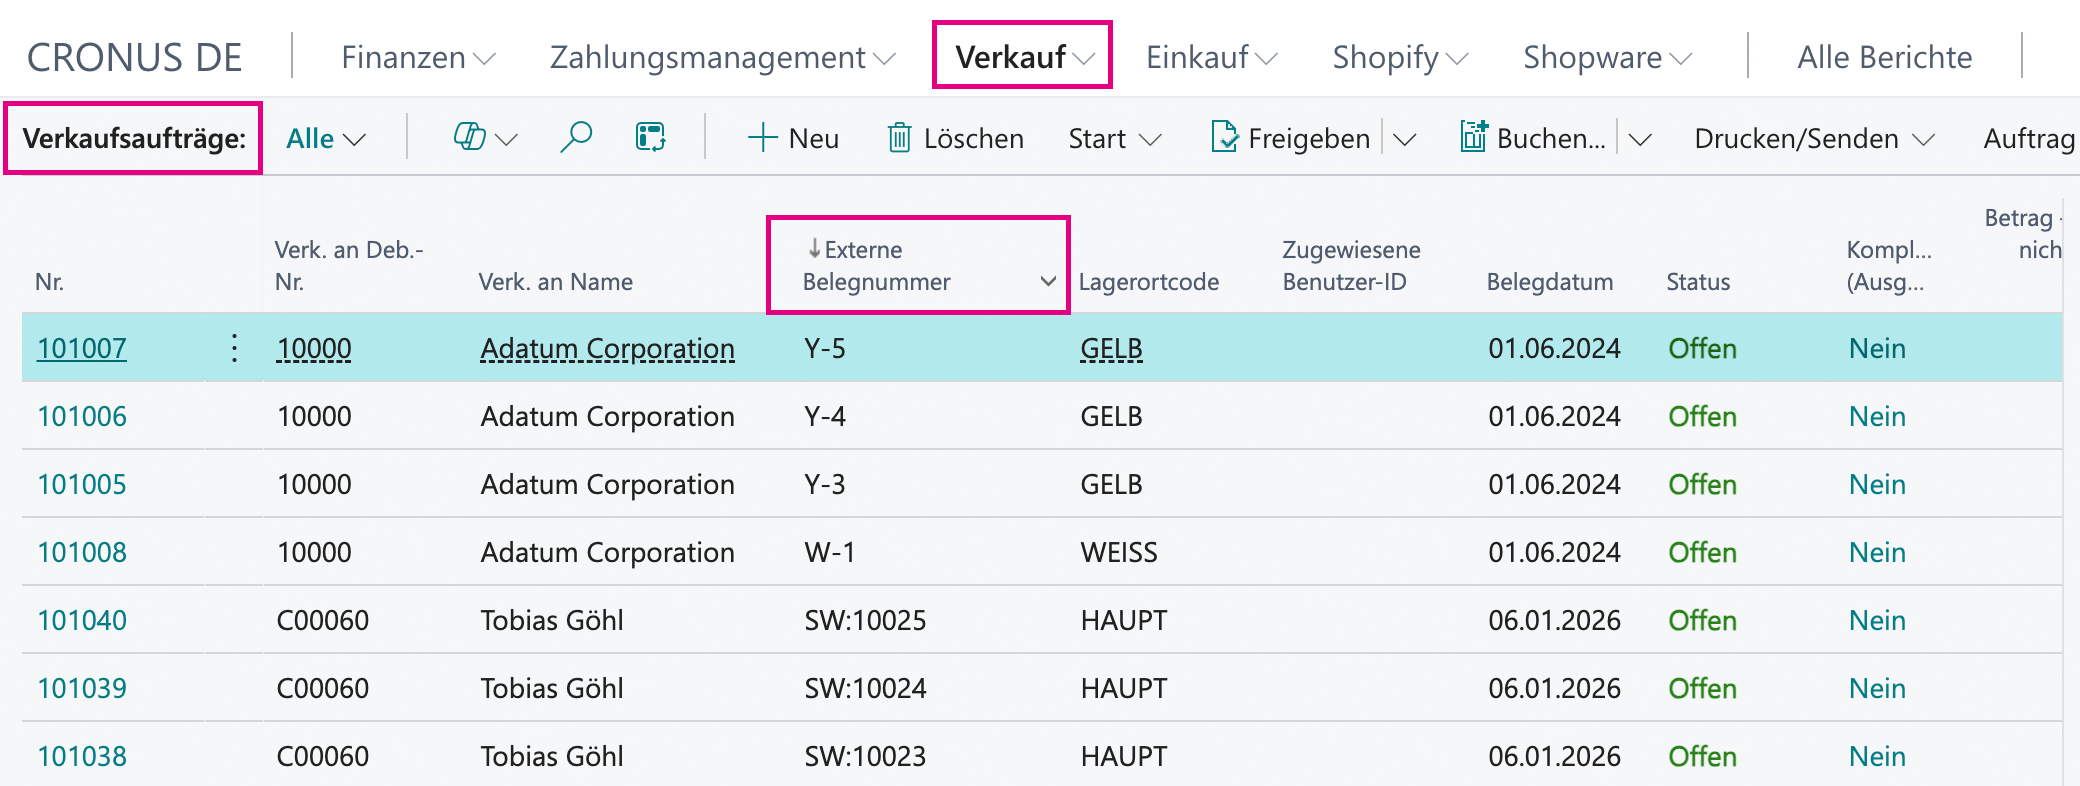
Via *Sales* :right: *Sales Orders* :right: filter on the external document number
{% endstep %}
{% step %}
Via *Shopware* :right: *Order Overview* :right: open the order
{% endstep %}
{% step %}
Search for the Shopware order number using the search.
{% endstep %}
{% endstepper %}
### 1.2 Order Card
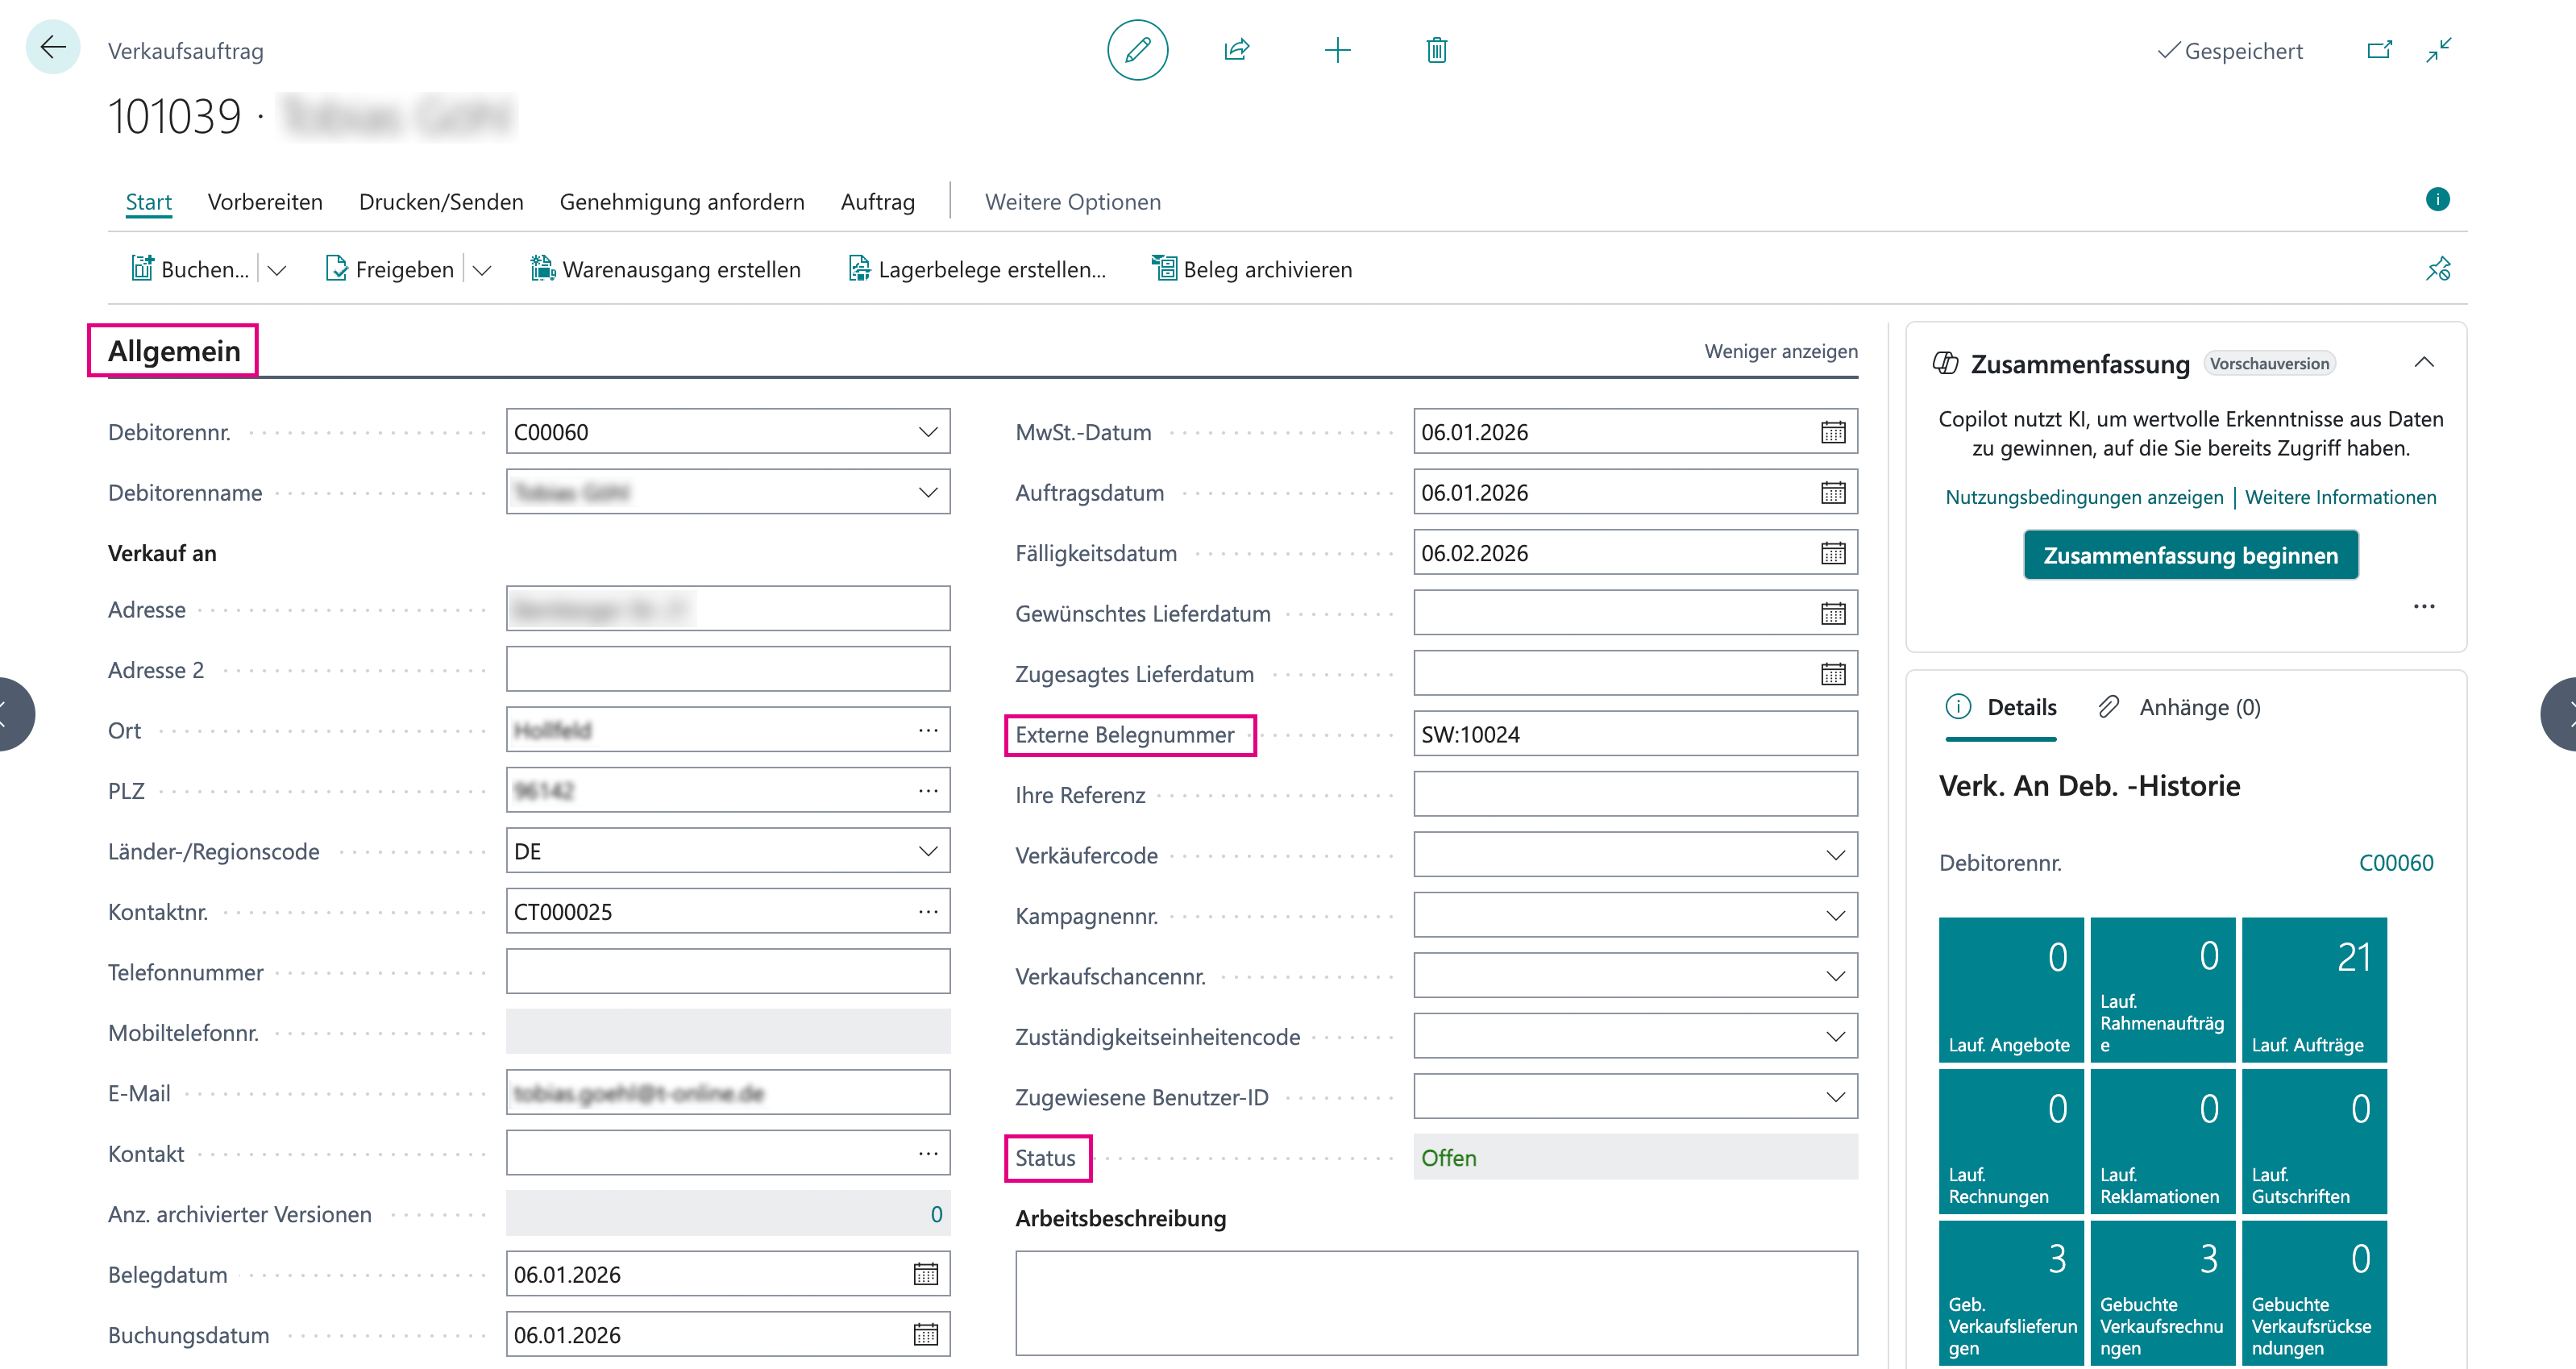
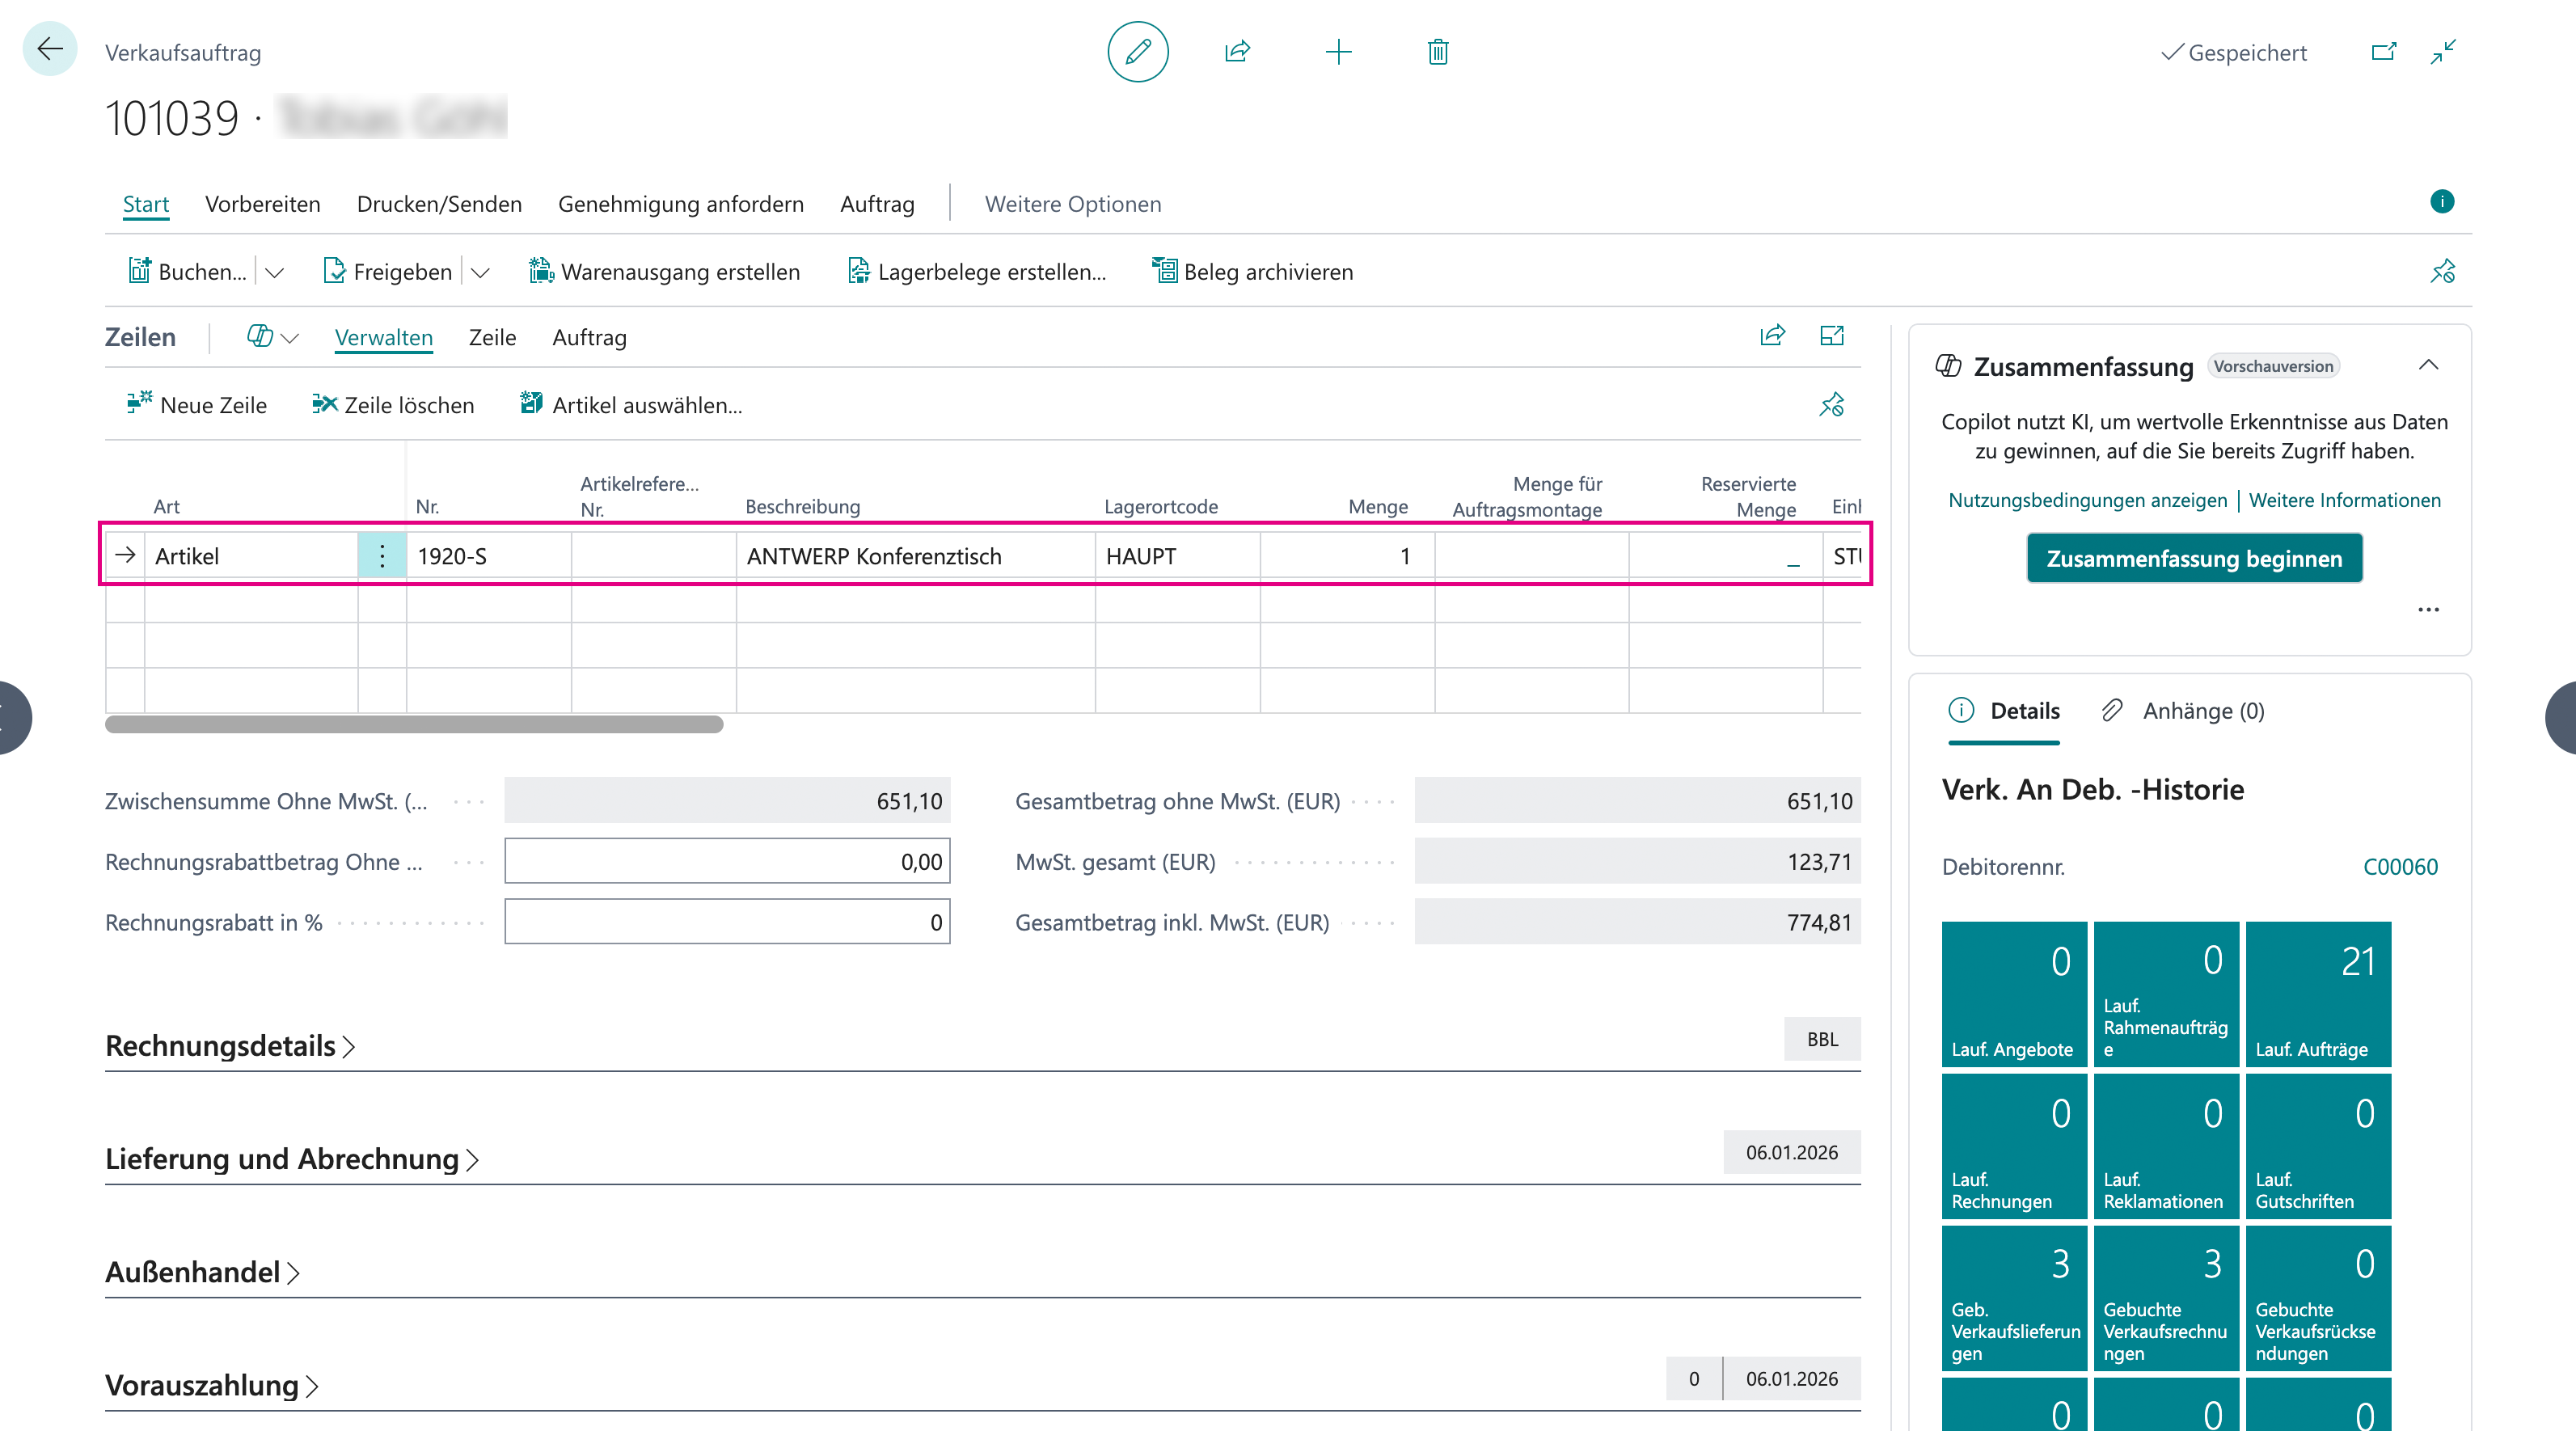
The order card contains:
General:
Customer and order data
Lines:
Ordered items
Shopware:
Additional Shopware information (order number, status)
## 2. Processing the Order
Checking the lines
Open the order.
Check the lines:
Are the item numbers correct?
Are the quantities and prices correct?
Are all items available?
Availability
If an item is unavailable:
Create a partial shipment.
Agree on a delivery date with the customer.
Reorder the item if necessary.
Adjustments
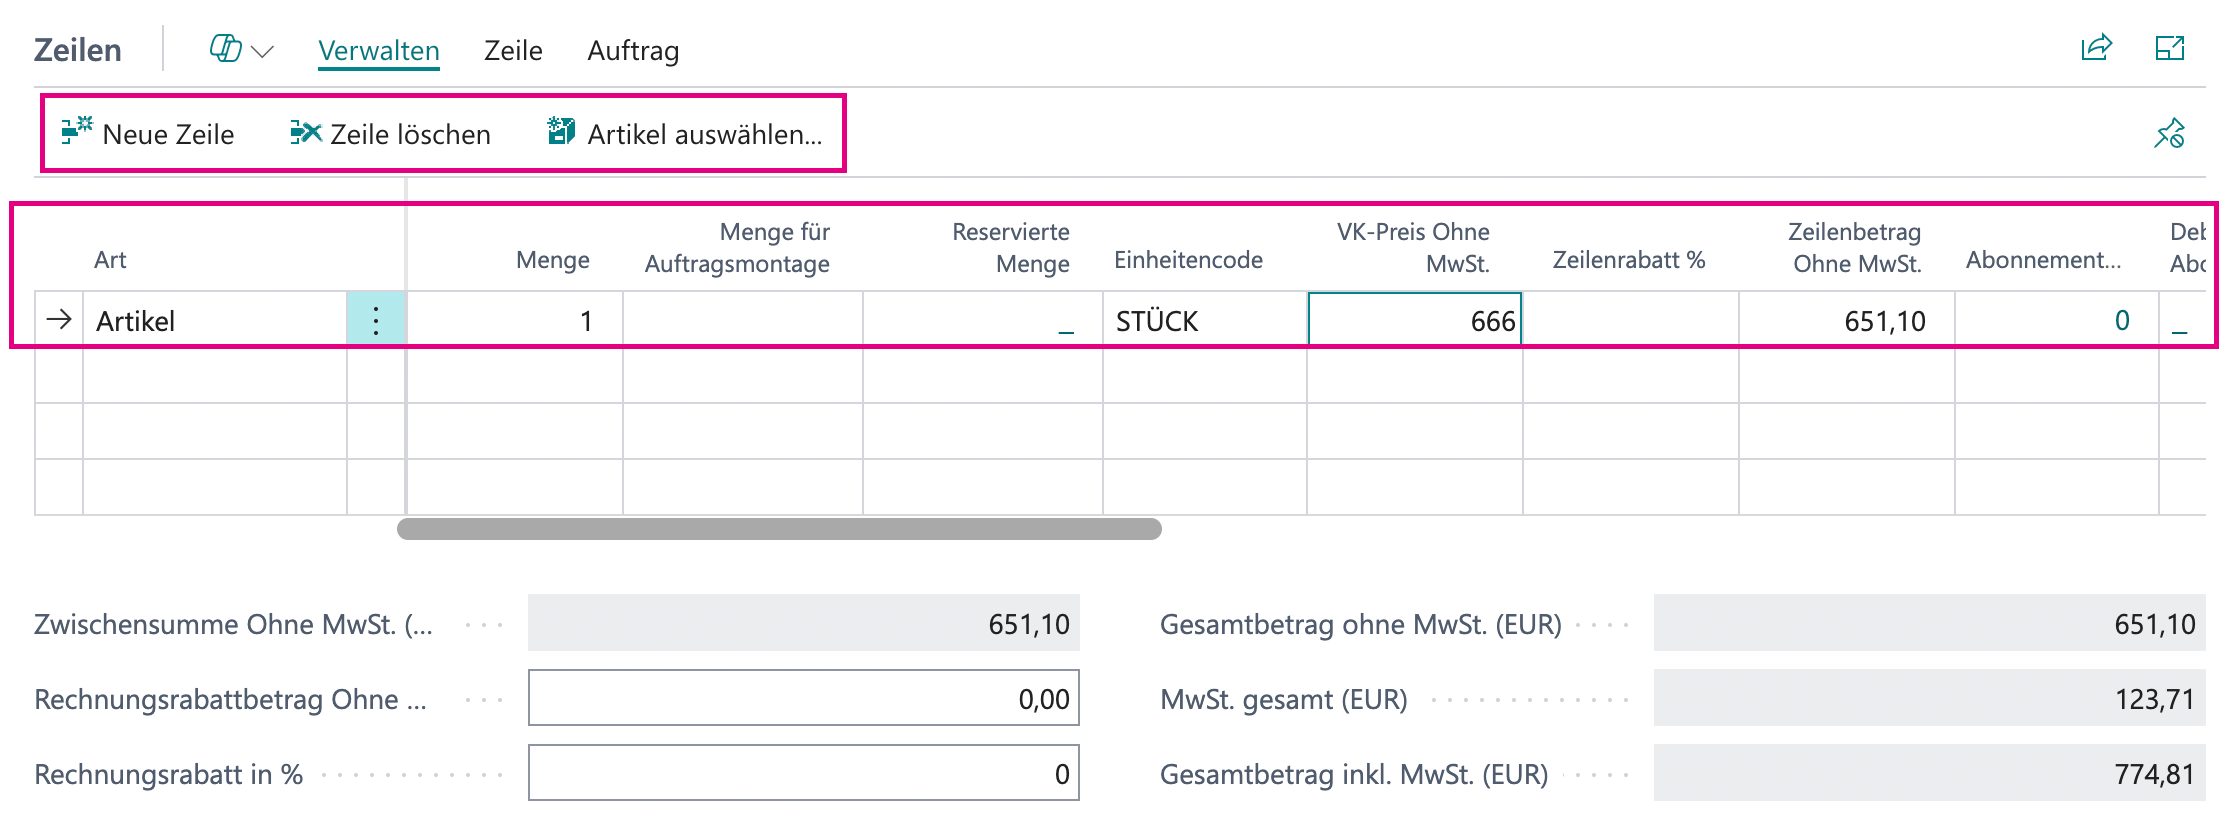
You can adjust the order:
Add or remove lines.
Adjust prices.
Grant discounts.
{% hint style="warning" %}
Changes to the order are **not** sent back to Shopware automatically!
{% endhint %}
## 3. Creating a Shipment and Creating an Invoice
### 3.1 Posting the Shipment
{% stepper %}
{% step %}
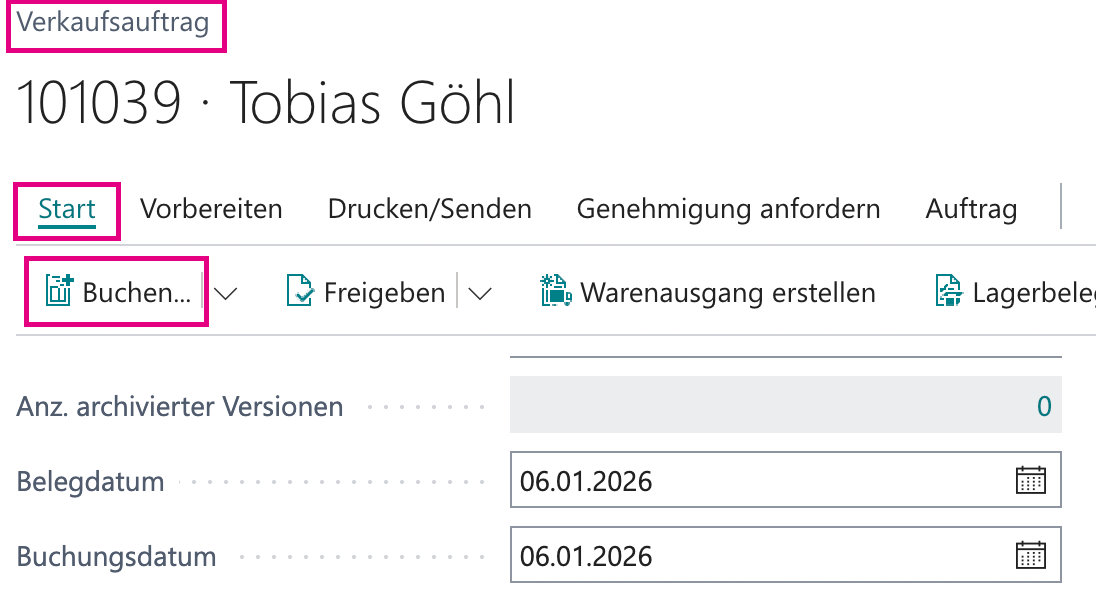
Open the *sales order*.
{% endstep %}
{% step %}
Select one of the *"Post"* options.
{% endstep %}
{% step %}
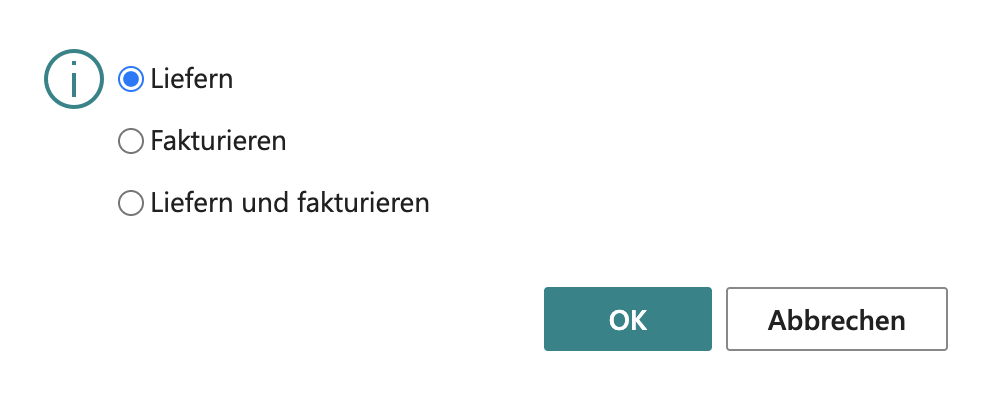
In the window that opens, select *one* of the three options: only *"Ship"*, only *"Invoice"*, or *"Ship and Invoice"*. Confirm with *"OK"*.
{% endstep %}
{% endstepper %}
{% hint style="info" %}
### Creating an invoice - posting the invoice
To post an invoice, first proceed exactly as described under *"3.1 Posting the Shipment"*.
In the last step, however, select the *"Invoice"* option and then confirm the process with *"OK"*.
{% endhint %}
{% hint style="info" %}
### Creating an invoice - combined posting
The step described under *"3.1 Posting the Shipment"* is the basis for the following process.
To create the shipment and the invoice in a single step, select the *"Ship and Invoice"* option. Then confirm the process with *"OK"*.
You will then find the posted invoice under *"Posted Sales Invoices"*.
{% endhint %}
### 3.2 Tracking Information
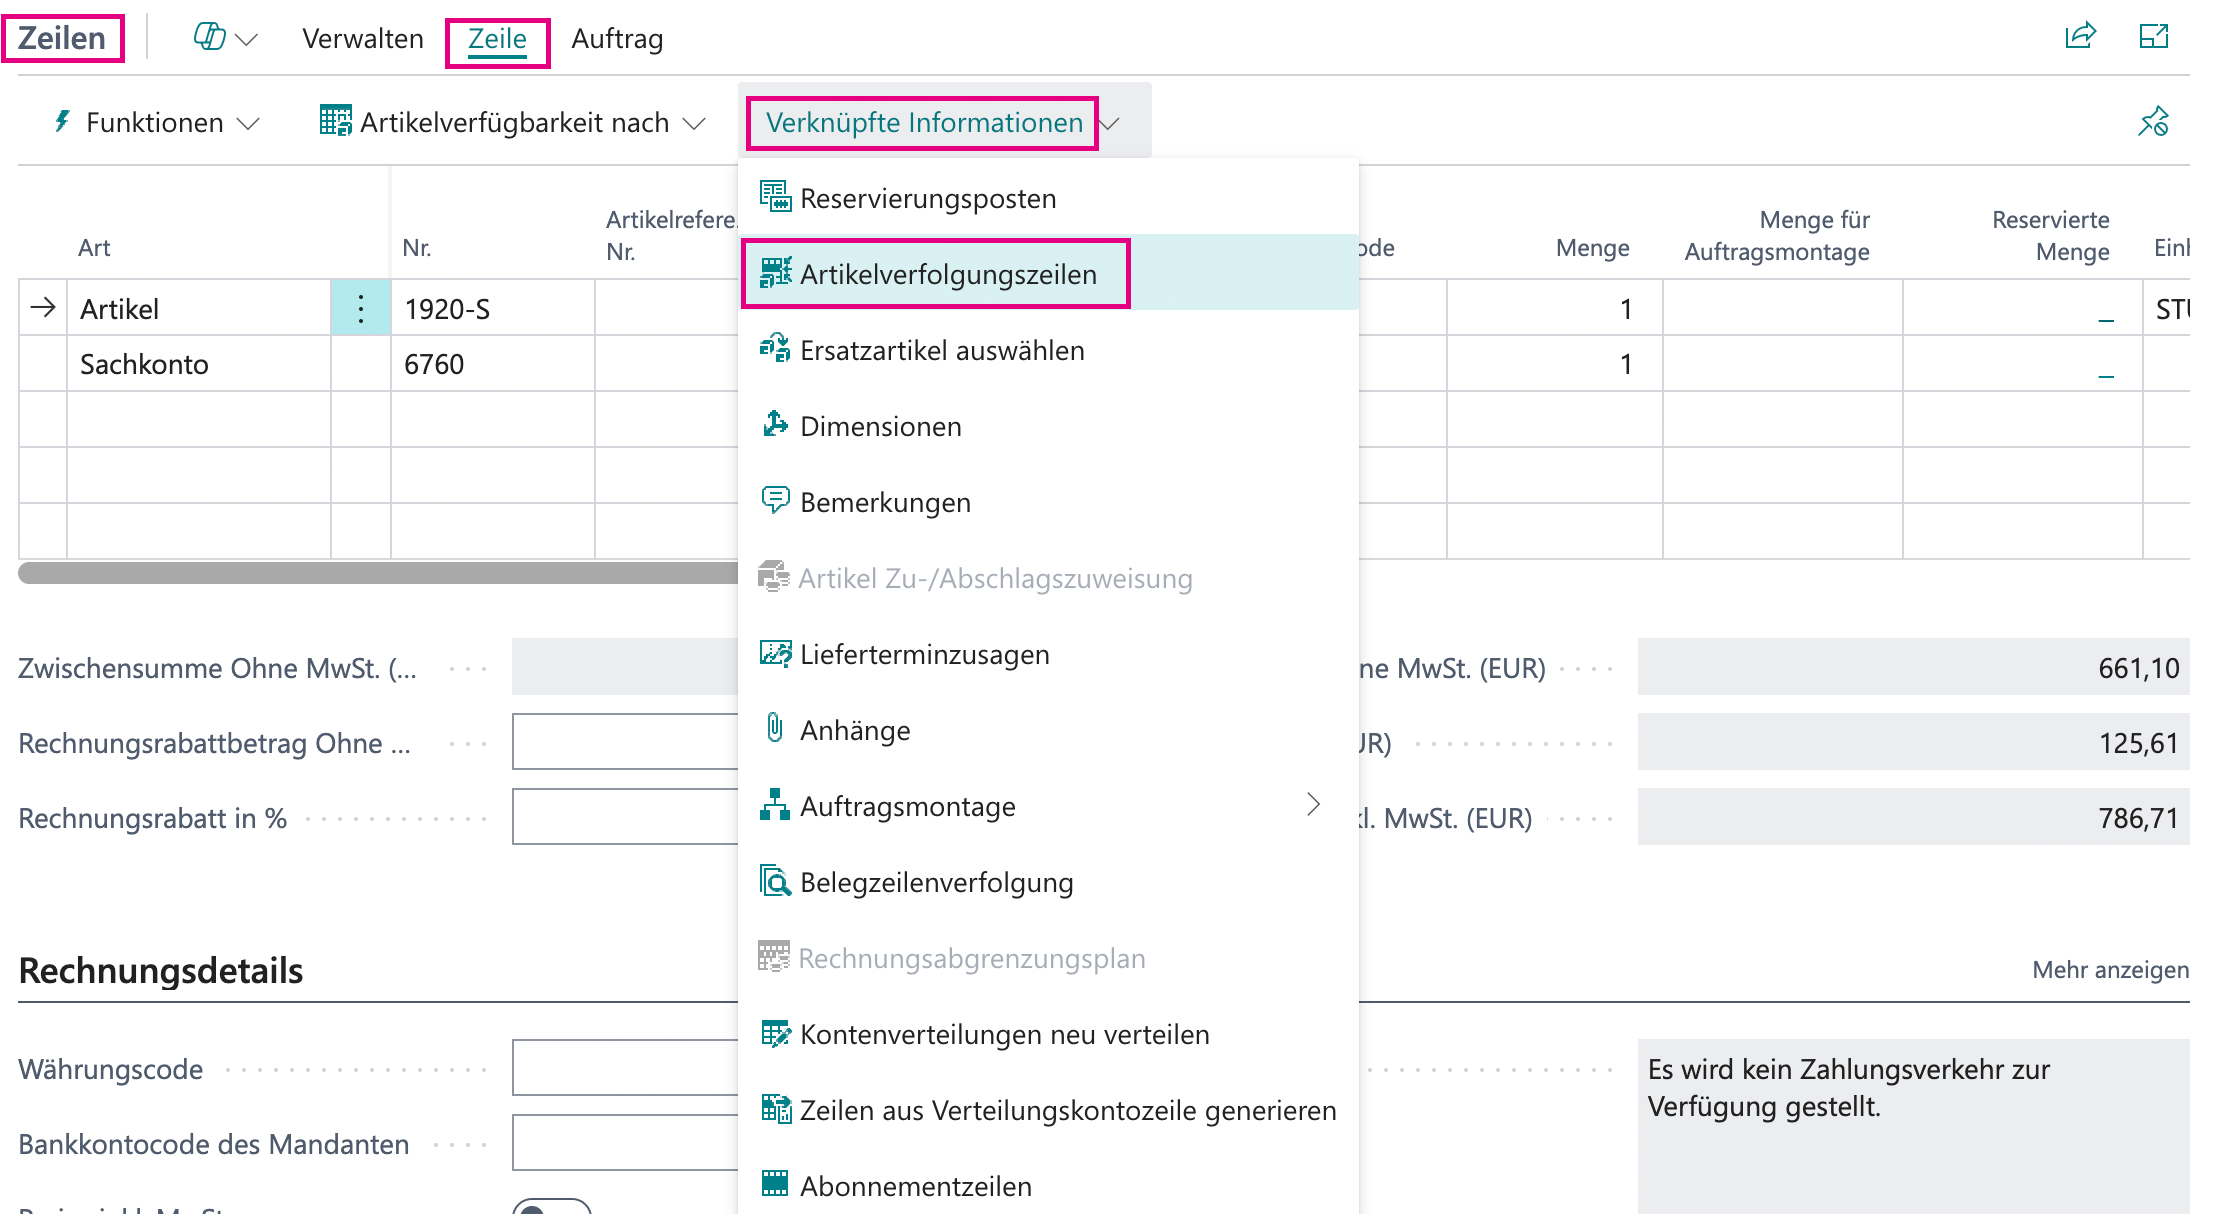
If *tracking numbers* are available, first open the corresponding *order*. Then navigate to *"Lines" → "Line" → "Item Tracking Lines"* to view or add the tracking information.
Alternatively, you can enter the package number directly in the field provided for it.
## 4. Creating a Credit Memo
For returns or complaints:
{% stepper %}
{% step %}
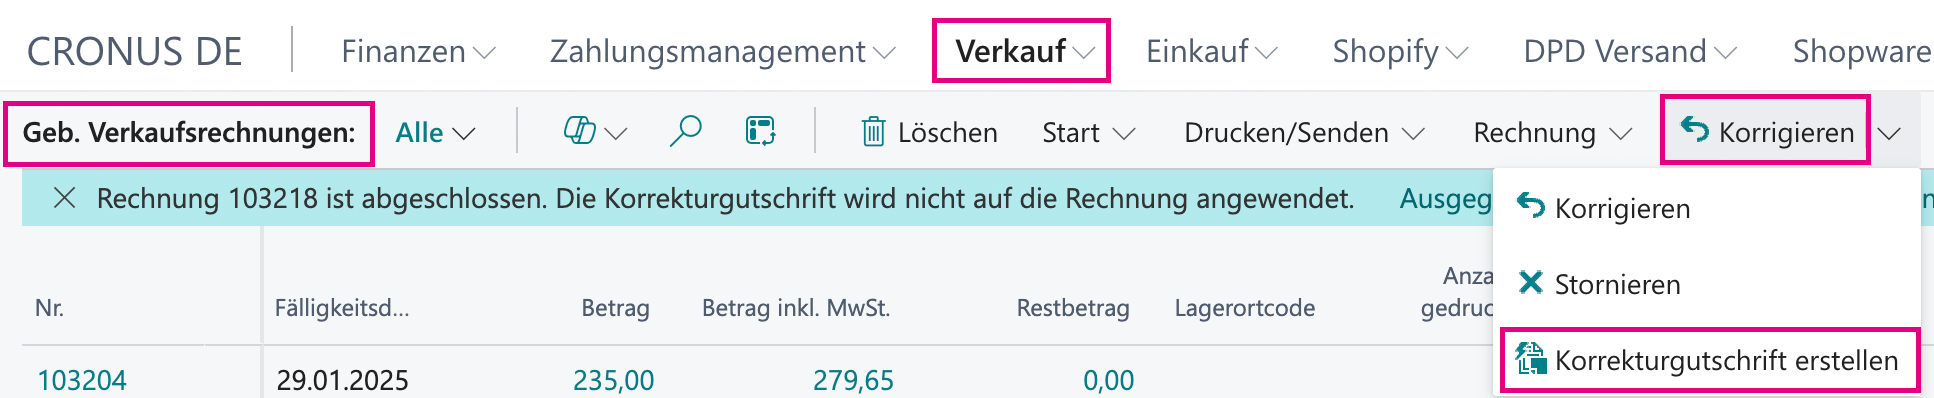
Open the *posted order* or the *posted invoice* (they must not be closed yet).
{% endstep %}
{% step %}
Click *"Correct"* and then *"Create Corrective Credit Memo"* in the drop-down menu.
{% endstep %}
{% step %}
Adjust the lines.
{% endstep %}
{% step %}
Post the credit memo. For an explanation of this step, see: [3. Creating a Shipment and Creating an Invoice](#id-3.-creating-a-shipment-and-creating-an-invoice).
{% endstep %}
{% endstepper %}
Tips for Day-to-Day Use
**Daily routines**
* **Morning**: import new orders.
* **Late morning**: check and process orders.
* **Midday**: prepare shipments.
* **Afternoon**: create invoices.
* **Evening**: synchronize the status.
**Documentation**
* Note any changes made to the order.
* Document your customer communication.
* Use the comment field.
**Quality control**
* Check addresses before shipping.
* Verify the item assignments.
* Monitor open entries.
---
# Agent Instructions
This documentation is published with GitBook. GitBook is the documentation platform designed so that both humans and AI agents can read, navigate, and reason over technical content effectively. Learn more at gitbook.com.
## Querying This Documentation
If you need additional information that is not directly available in this page, you can query the documentation by asking a question.
Perform an HTTP GET request on the following URL with the `ask` and `goal` query parameters:
```
GET https://docs.solutioo.de/shopware/shopware6_en_us/order-processing/order-handling-in-bc.md?ask=&goal=
```
`ask` is the immediate question: it should be specific, self-contained, and written in natural language.
`goal` is what the user is ultimately trying to achieve, the reason they need the answer. Sharing it helps GitBook give you a better, more relevant answer. A goal is most helpful when it describes the outcome the user wants rather than restating the question. For example, with `ask=how do I create an API token`, a goal like `automate deployments from our CI pipeline` lets GitBook tailor the answer to that use case.
The response will contain a direct answer to the question and relevant excerpts and sources from the documentation.
Use this mechanism when the answer is not explicitly present in the current page, you need clarification or additional context, or you want to retrieve related documentation sections.