> For the complete documentation index, see [llms.txt](https://docs.solutioo.de/llms.txt). Markdown versions of documentation pages are available by appending `.md` to page URLs; this page is available as [Markdown](https://docs.solutioo.de/universal-import/universalimport_en_us/step-by-step-guide/editor.md).

# Import Mapping

## Import Mapping

The **import mapping** in **Universal Import** is used to transfer data from external files into Business Central in a structured way. It allows file columns to be assigned specifically to the corresponding fields and helps manage recurring imports efficiently.

For a clear overview and quick reference, the following table presents the individual elements of the **Import Mapping** section.

{% stepper %}
{% step %}
[**Create a mapping**](#id-1.-zuordnung-erstellen)
{% endstep %}

{% step %}
[**Assign columns**](#id-2.-spalten-zuordnen)
{% endstep %}

{% step %}
[**Virtual columns**](#id-3.-virtuelle-spalten)
{% endstep %}

{% step %}
[**Copy and reuse**](#id-4.-kopieren-und-wiederverwenden)
{% endstep %}
{% endstepper %}

### 1. Create a mapping

A **mapping** is a reusable template that defines how the data from your file is assigned to fields in Business Central. It allows you to define once which table is imported which file format is used and how the system should behave during the import.

#### 1.1 **Create a New Mapping**

**How do you access the “Import Mapping Card”?**

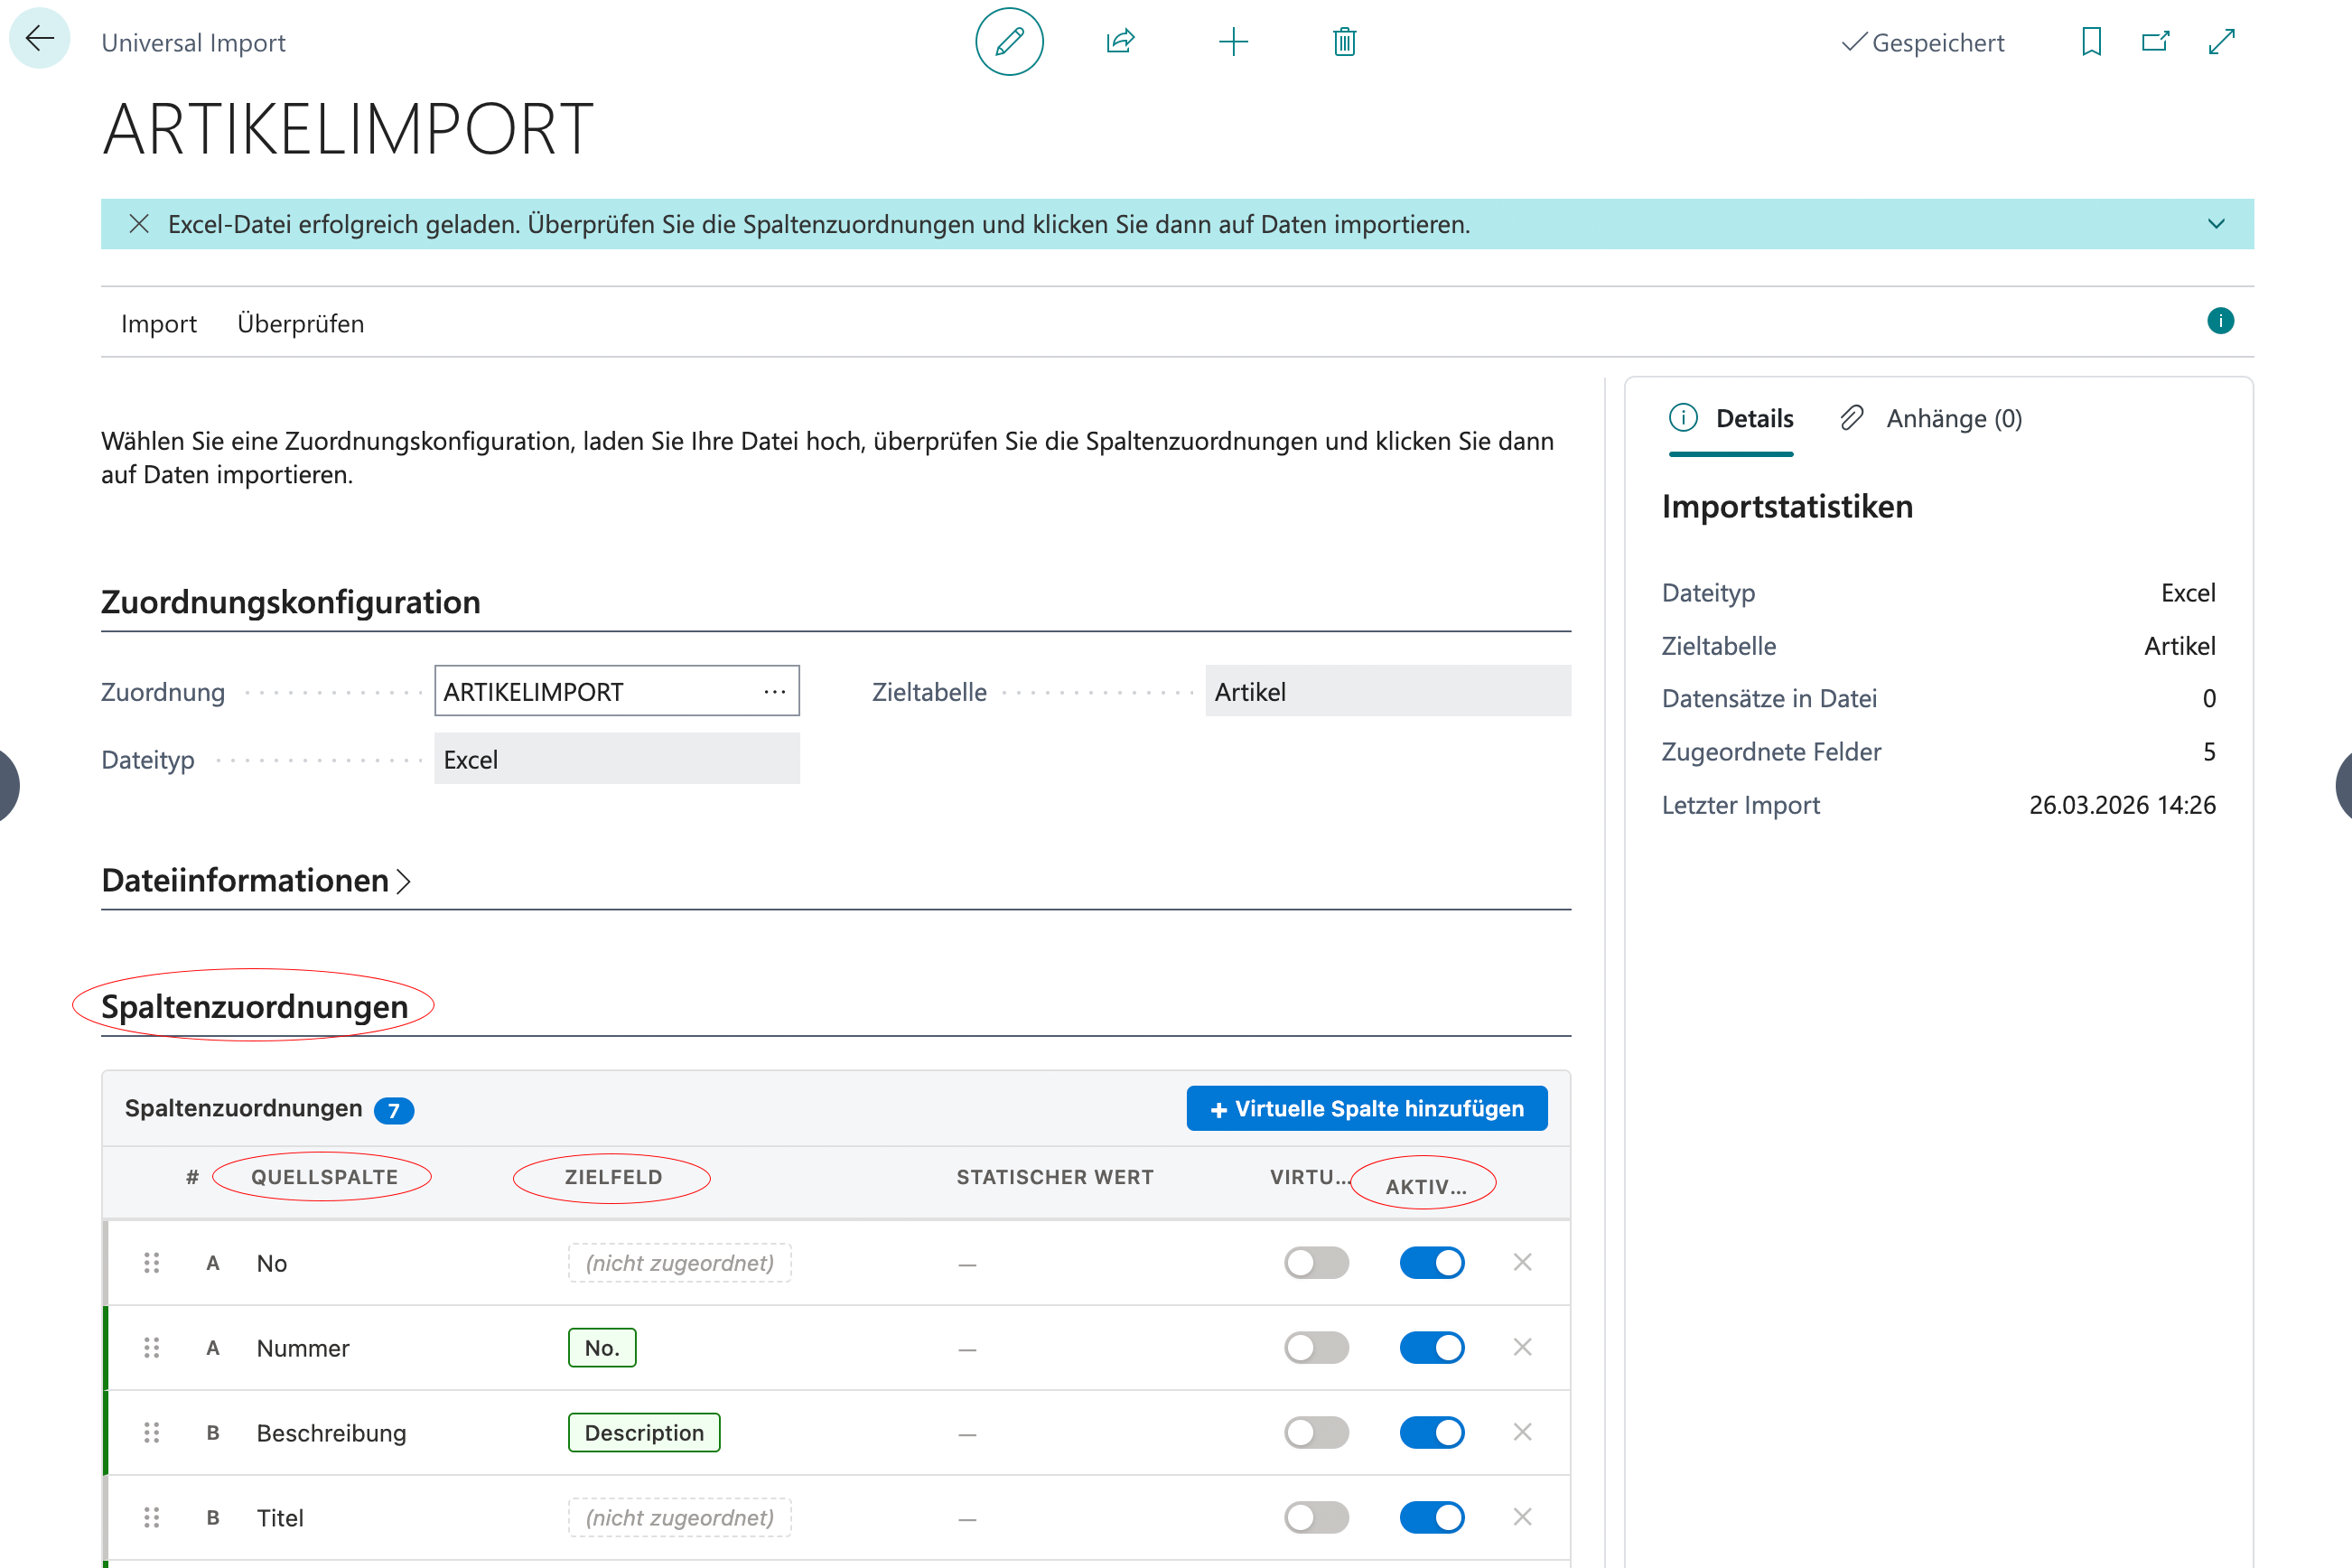
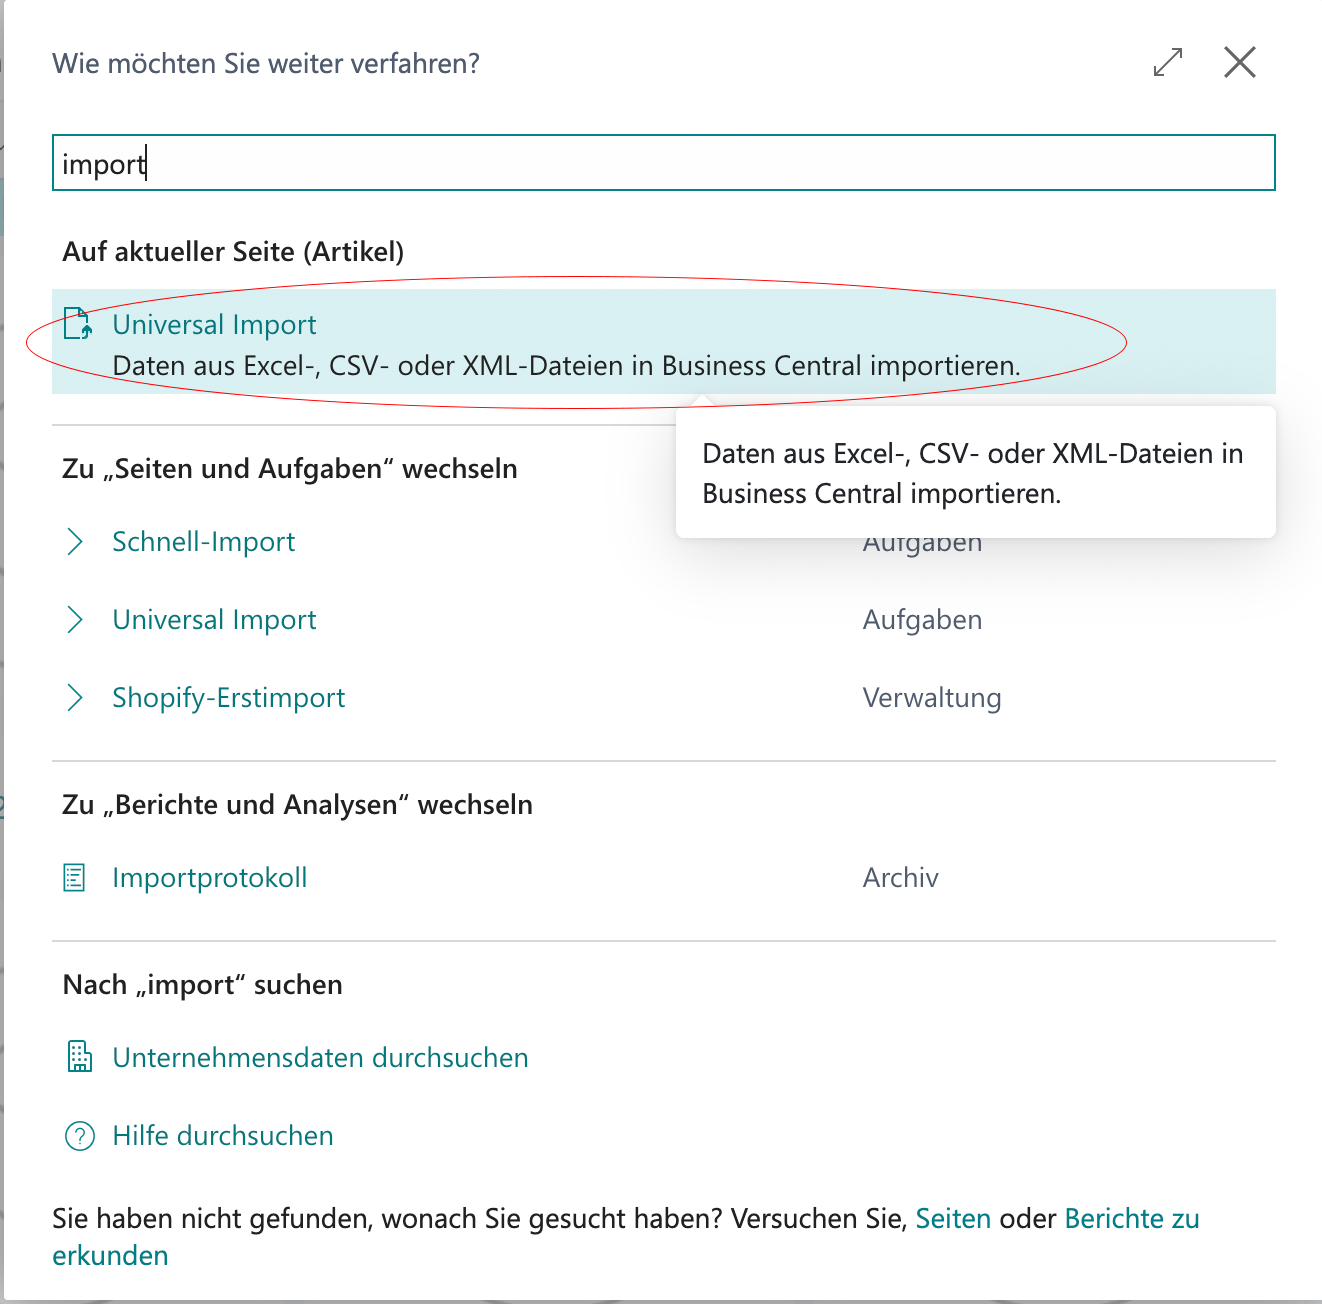
Open the *“Universal Import”* page using the Business Central search.\
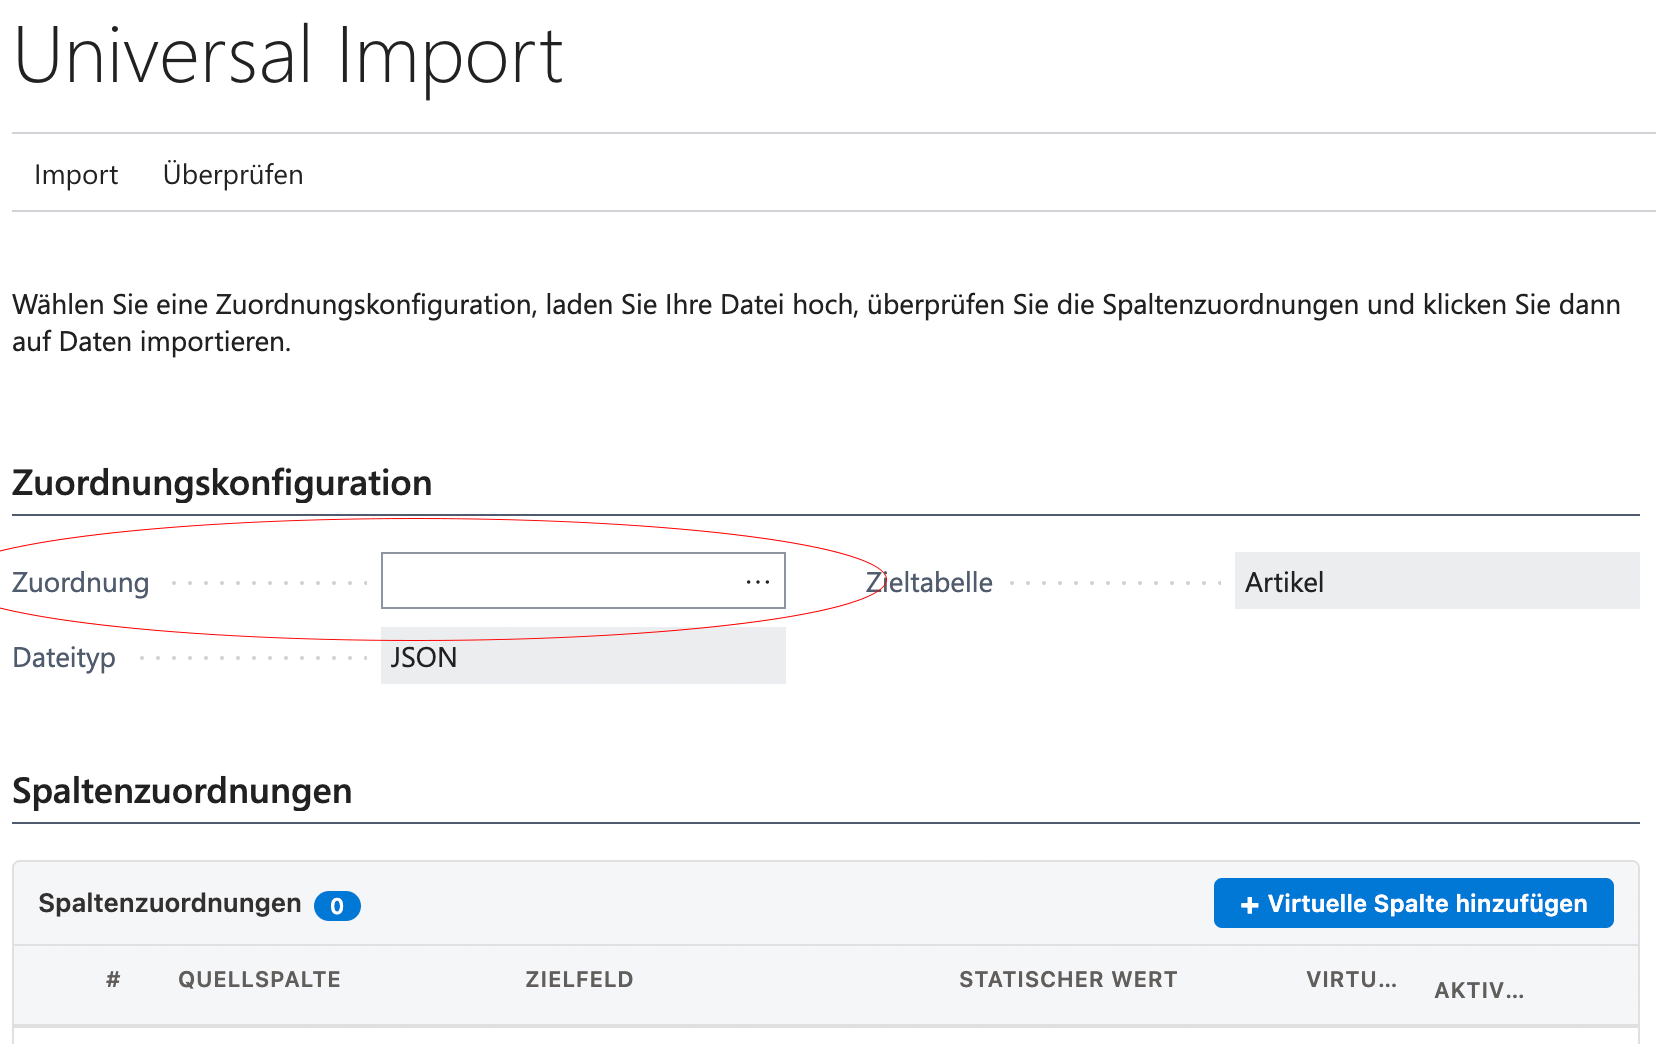
In the menu that opens navigate to *“Mapping Configuration”* and select *“Mapping”*.\
Then click the *three dots (...)* to open the context menu and choose *“+ New”* to create a new mapping.\
You can now enter the required master data on the *“Import Mapping Card”* page that opens.\
Finally, save the record.

{% columns %}
{% column %}

<figure><img src="https://content.gitbook.com/content/QnKDhTKr7wRrsfjyv1Ev/blobs/AoB7tpq2EHXtrdl4uqxd/Bildschirmfoto%202026-03-31%20um%2009.13.33.png" alt=""><figcaption><p>In BC search</p></figcaption></figure>
{% endcolumn %}

{% column %}

<figure><img src="https://content.gitbook.com/content/QnKDhTKr7wRrsfjyv1Ev/blobs/eMGXucTZf9StLPHSpDnn/Bildschirmfoto%202026-03-31%20um%2009.20.22.png" alt="" width="563"><figcaption><p>Universal Import</p></figcaption></figure>
{% endcolumn %}

{% column %}

<figure><img src="https://content.gitbook.com/content/QnKDhTKr7wRrsfjyv1Ev/blobs/sXXSxCB868WssWDgBKgW/Bildschirmfoto%202026-03-31%20um%2009.15.31.png" alt=""><figcaption><p>Choose mapping</p></figcaption></figure>
{% endcolumn %}
{% endcolumns %}

#### 1.2 Fields on the mapping card

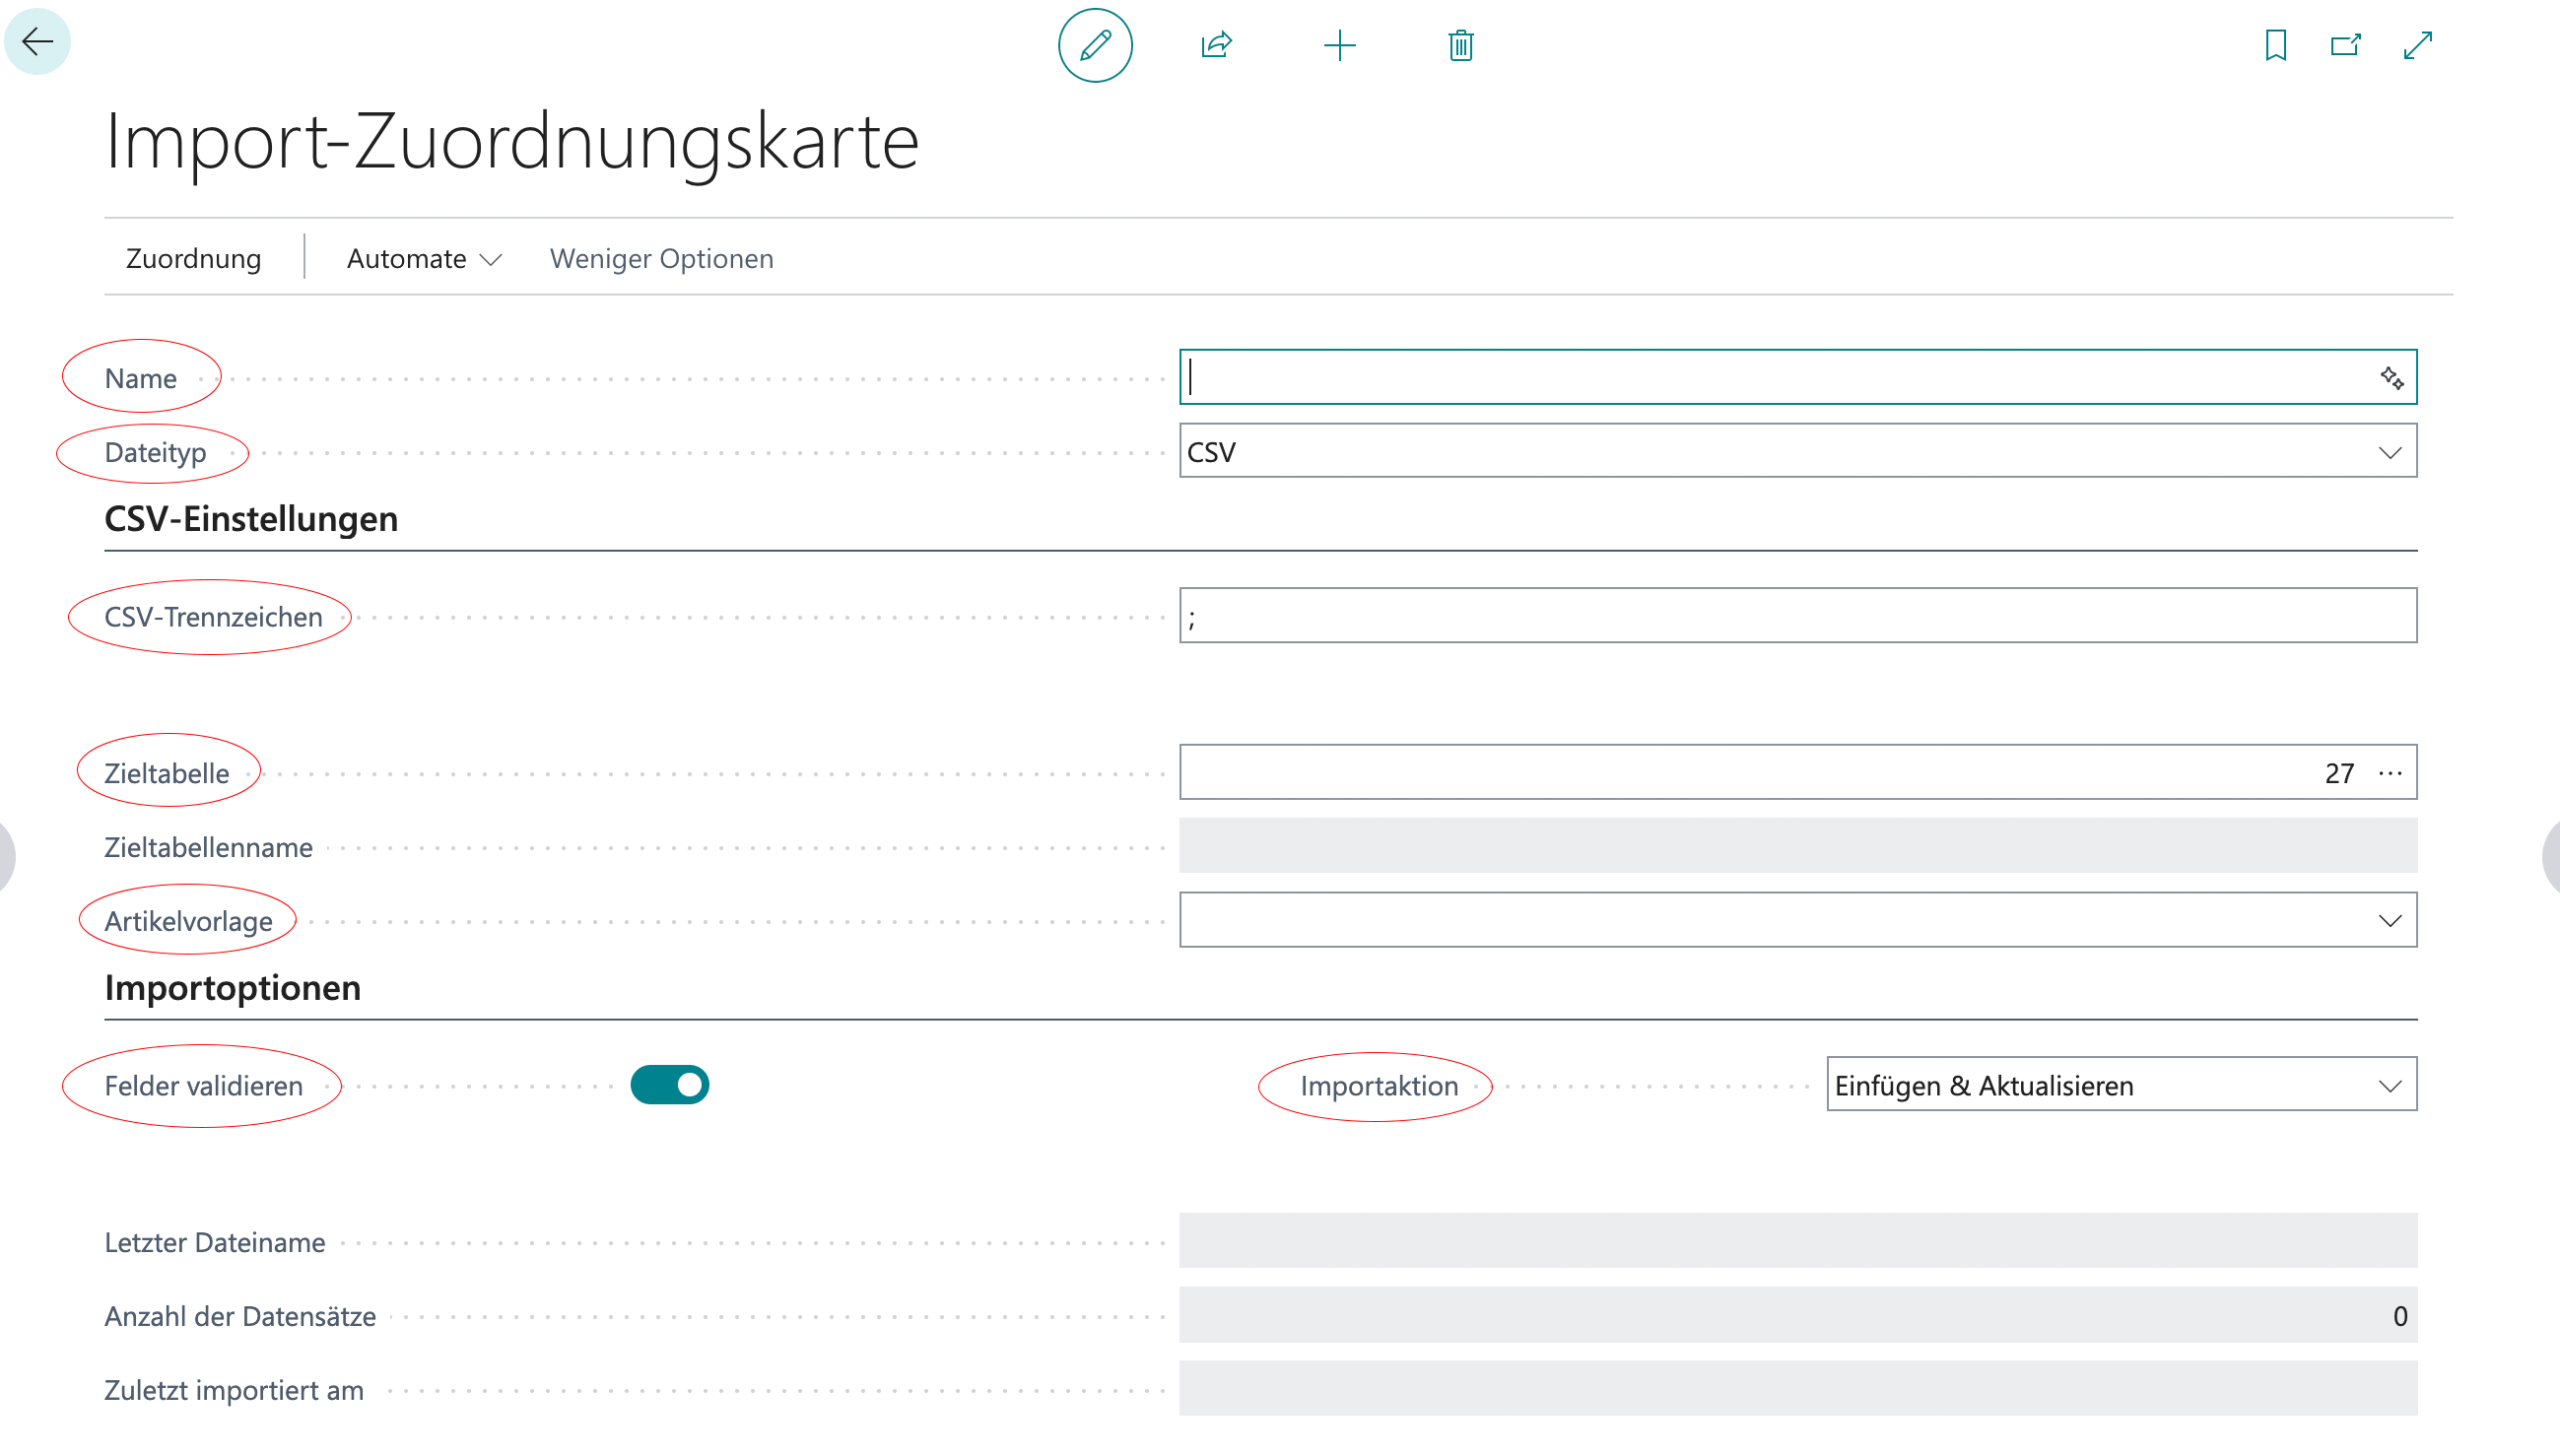
The most important fields in the mapping header are:

* **Name:** A meaningful name for the mapping, for example *“Items from Supplier Excel”.*
* **File Type** (Mapping Type): Excel, CSV, XML, or JSO&#x4E;**.** It must match the format of your source file.

{% hint style="warning" %}
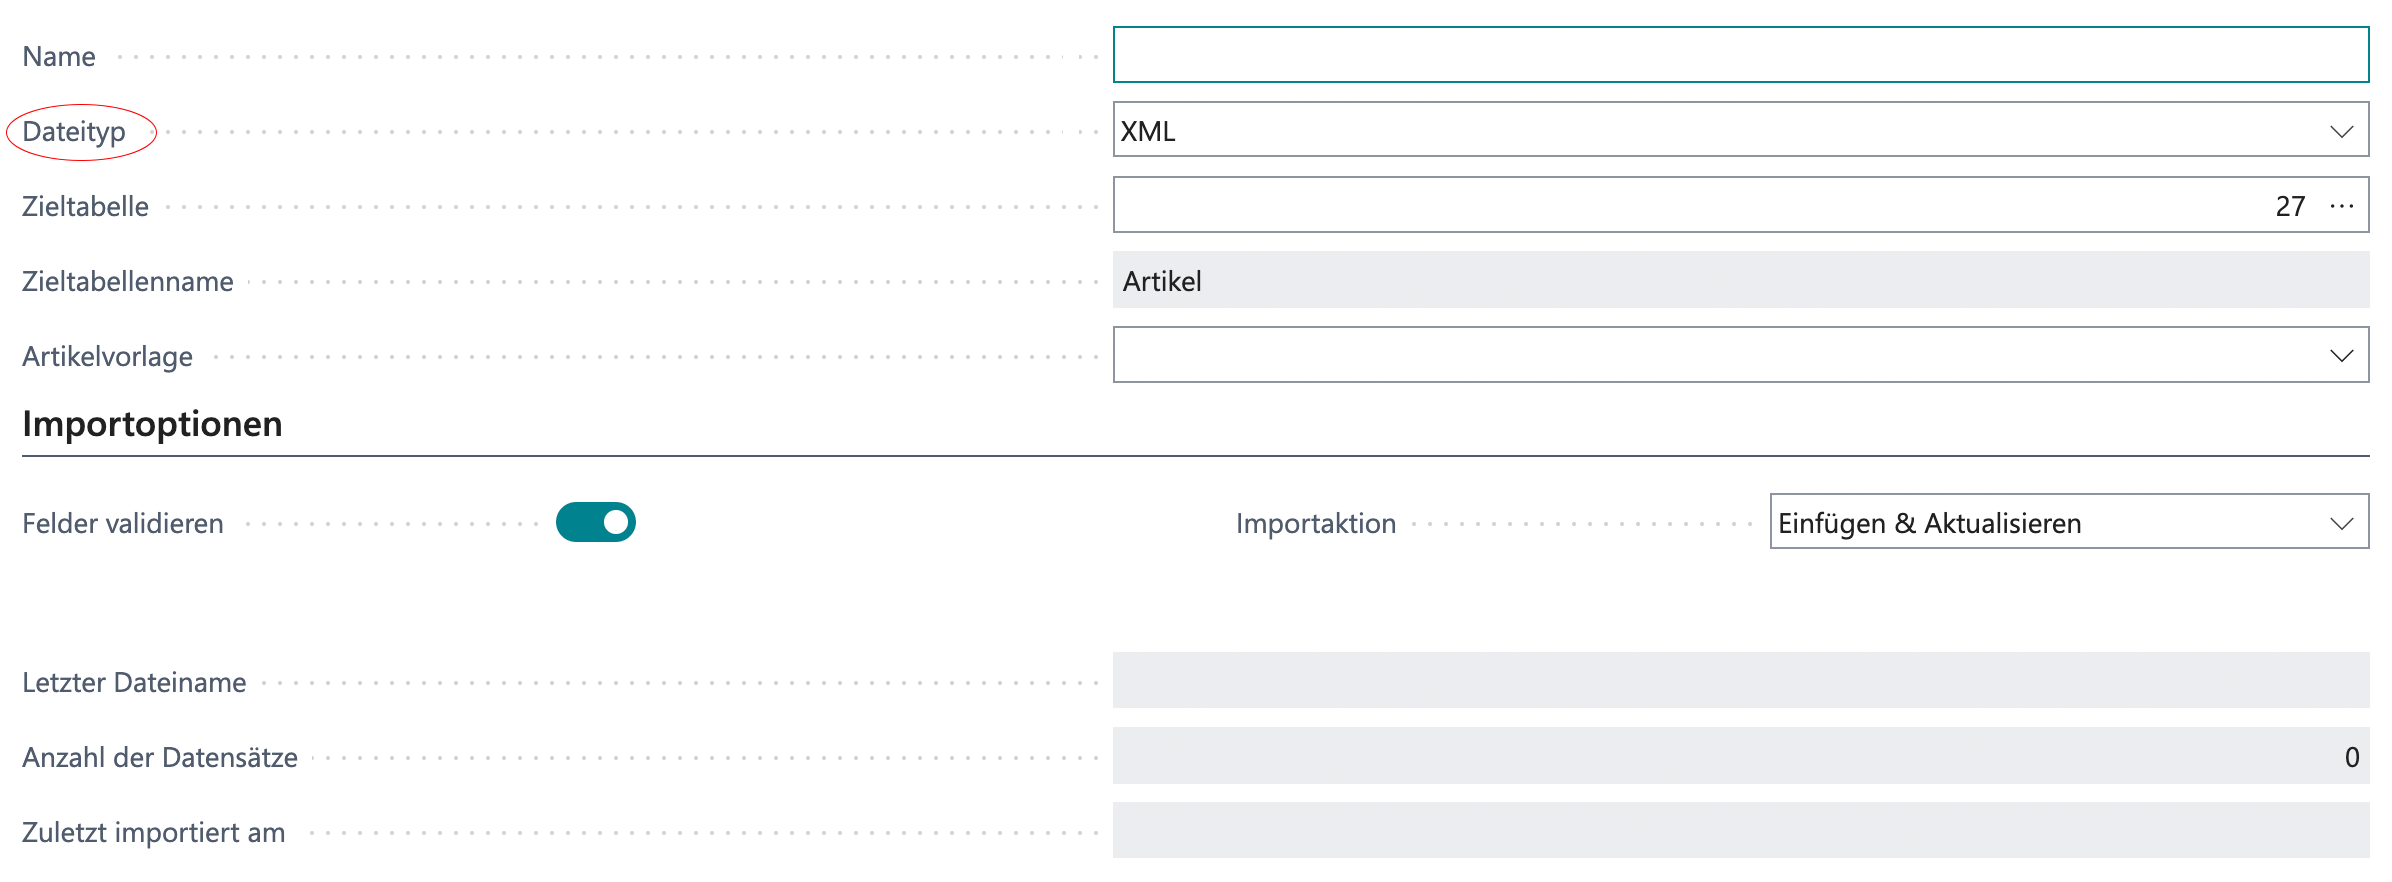
The fields displayed and to be completed on the Import Mapping Card vary depending on the selected file type.
{% endhint %}

* **CSV Separator:** The separator used for CSV files. A **semicolon** is typically used.
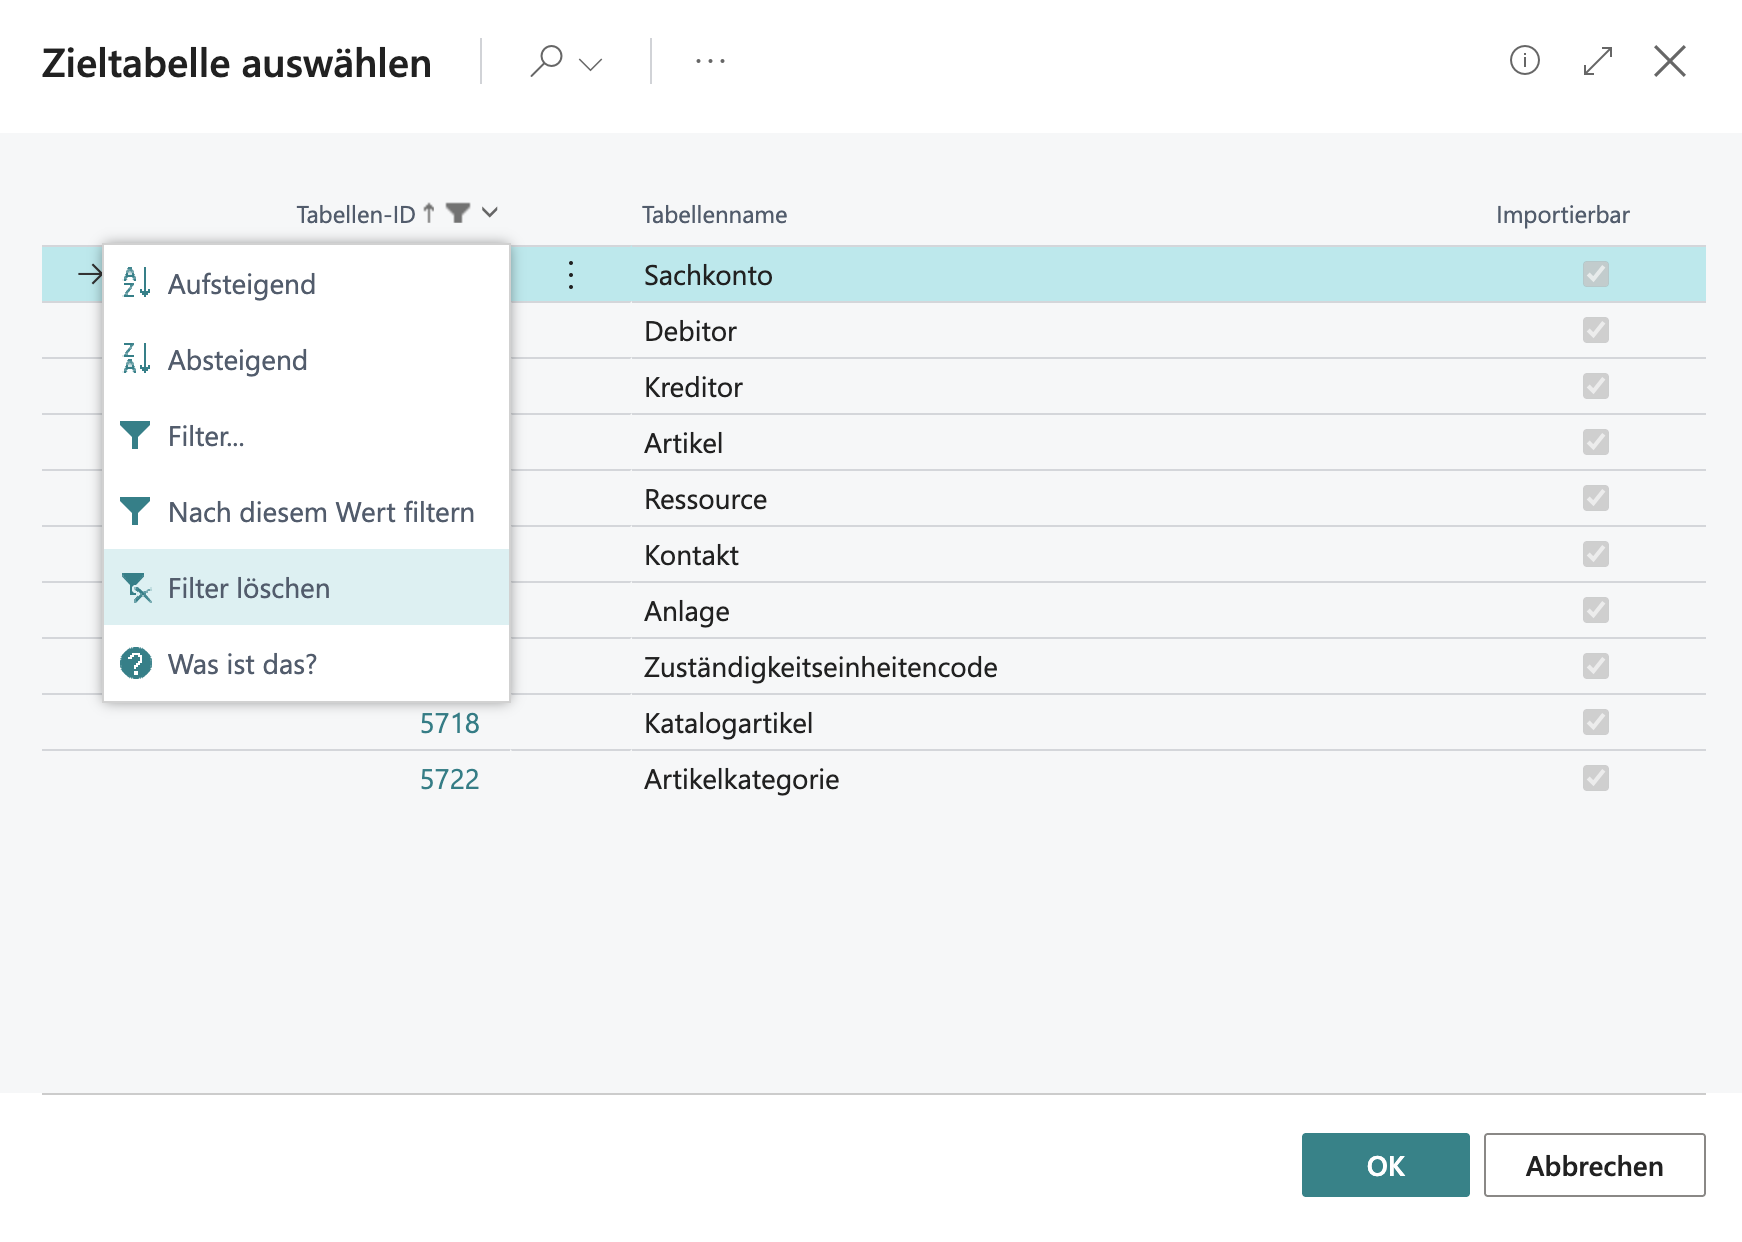
* **Target Table:** Specify the BC table into which the data should be imported.

  Use the table lookup (...) to open the list of available tables. In the *“Select Target Table”* menu a filter is applied by default so that only the most common entries are shown. To display all available lines click *“Table ID”* and select *“Clear Filter”* from the drop-down menu. You can then choose the desired target table.

<div align="left" data-with-frame="true"><figure><img src="https://content.gitbook.com/content/QnKDhTKr7wRrsfjyv1Ev/blobs/lLGpU63DTaVeo99C6U17/Bildschirmfoto%202026-03-31%20um%2009.36.58.png" alt="" width="375"><figcaption><p>Select the Target Table; Pay Attention to the Filter</p></figcaption></figure></div>

* **Target Table Name:** These fields are filled automatically based on the selected target table.
* **Item Template:** Optional; only relevant when importing into the **Item** table. It defines which BC item template is used for newly created items.
* **JSON Record Path:** The dot path to the **record array** in nested JSON (for example `data.items`). Leave this field empty if the root element is already the array.
* **Validate Fields:** This option is enabled by default. Values are then validated automatically and other fields are filled accordingly.
* For more complex tables, it may be better to disable this option to avoid errors.
* **Import action:**

{% tabs %}
{% tab title="" %}
**Used as the default option.**

Creates new records and updates existing ones.

**Example use:** General use for initial data import and ongoing updates based on the same file logic.
{% endtab %}

{% tab title="" %}
Creates new records only; existing records are not overwritten.

**Example use:** Add new products without changing existing master data.
{% endtab %}

{% tab title="" %}
Updates existing records only; new keys from the file are not created.

**Example use:** Update prices or quantities without accidentally creating new items.
{% endtab %}
{% endtabs %}

<div align="left" data-with-frame="true"><figure><img src="https://content.gitbook.com/content/QnKDhTKr7wRrsfjyv1Ev/blobs/onsh8FZjEzqrZeCLwsgb/Bildschirmfoto%202026-03-31%20um%2009.03.48.png" alt=""><figcaption><p>View when selecting the file type CSV or JSON</p></figcaption></figure></div>

<div align="left" data-with-frame="true"><figure><img src="https://content.gitbook.com/content/QnKDhTKr7wRrsfjyv1Ev/blobs/an7rmHnTNtL4UH0wQ428/Bildschirmfoto%202026-03-31%20um%2009.09.14.png" alt=""><figcaption><p>View when selecting the file type XML or Excel</p></figcaption></figure></div>

{% hint style="success" %}
After creating the mapping upload a sample file on the *“Universal Import”* page. This allows the file columns to be recognized so that you can conveniently set up the *column mapping*.
{% endhint %}

{% hint style="danger" %}
For the import and the subsequent process refer to markdown. The further procedure is described in that section.
{% endhint %}

### 2. Assign Columns

Once you have uploaded a file on the import page, the *“Column Mapping”* section appears with all columns recognized from the file. There, you link each source column to a target field in BC and control the order as well as the activation.

#### Functions of the mapping list

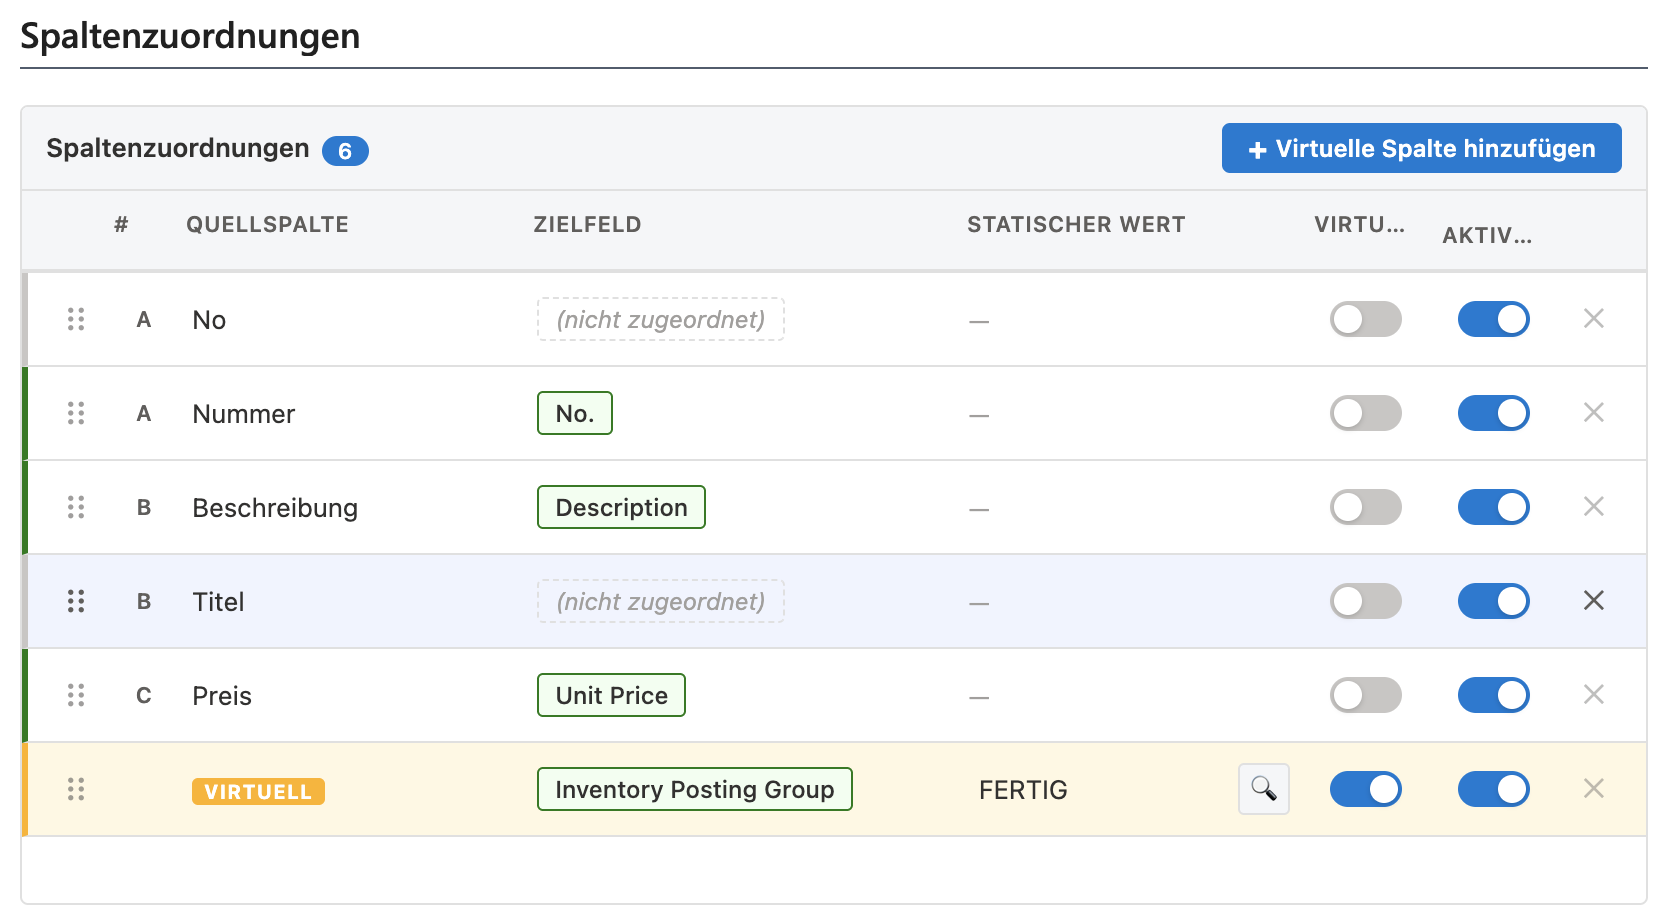
<table data-view="cards"><thead><tr><th></th><th></th></tr></thead><tbody><tr><td>Each row shows:</td><td><ul><li><strong>Source Column</strong></li><li><strong>Target field</strong> (BC-field)</li><li><strong>Static value</strong></li><li><strong>Virtual column</strong></li><li><strong>active/inactive</strong>.</li></ul></td></tr><tr><td><strong>Color coding:</strong></td><td><ul><li><mark style="color:$success;">green</mark> border = assigned</li><li>grey = not assigned yet</li><li><mark style="background-color:yellow;">yellow</mark> = virtual column</li></ul></td></tr><tr><td><strong>Change target field</strong></td><td>Click the <strong>target field</strong> button to open the field selection dialog for the <strong>target table</strong> and change the field assignment.</td></tr><tr><td><strong>Drag and Drop:</strong></td><td>Drag rows with the mouse to change the <strong>processing order</strong>. This is important if the validation of <strong>field A</strong> only works after <strong>field B</strong> has been set.</td></tr><tr><td><strong>Toggle all:</strong></td><td>Use the <strong>active</strong> checkbox in the header row to enable or disable all columns at once.</td></tr><tr><td>Deactivated columns are skipped during the import.</td><td></td></tr></tbody></table>

<div align="left" data-with-frame="true"><figure><img src="https://content.gitbook.com/content/QnKDhTKr7wRrsfjyv1Ev/blobs/Wd9OK8S87l5KTYrh0fKE/Bildschirmfoto%202026-03-31%20um%2010.12.35.png" alt="" width="563"><figcaption></figcaption></figure></div>

<br>

### 3. Virtual columns

A virtual column provides the same predefined value for **every** imported line. It does not come from your file but is defined in the mapping. This is ideal when information is missing from the file but is the same for all lines.

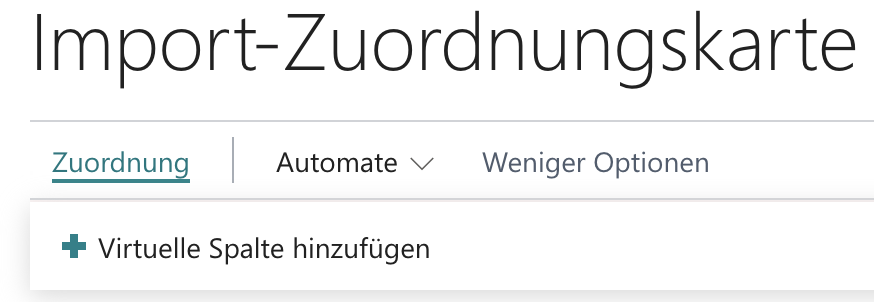
On the Universal Import page or on the Mapping Card click *“Add Virtual Column”.* Then select the target field and enter the value.

<div><figure><img src="https://content.gitbook.com/content/QnKDhTKr7wRrsfjyv1Ev/blobs/57Q4bNBMb19mGD8xQHxN/Bildschirmfoto%202026-03-31%20um%2010.33.14.png" alt=""><figcaption><p>Mapping card</p></figcaption></figure> <figure><img src="https://content.gitbook.com/content/QnKDhTKr7wRrsfjyv1Ev/blobs/qFmA85beTQYrkYnaCxeU/Bildschirmfoto%202026-03-31%20um%2010.35.02.png" alt=""><figcaption><p>Universal Import</p></figcaption></figure></div>

#### Typical use cases

<table data-view="cards"><thead><tr><th align="center"></th><th align="center"></th></tr></thead><tbody><tr><td align="center"><i class="fa-money-bills">:money-bills:</i></td><td align="center">Your file does not contain a <strong>Price List Code</strong> column but all lines belong to the same price list.</td></tr><tr><td align="center"><i class="fa-code">:code:</i></td><td align="center"><p>You want to set the same <strong>source type</strong> for all imported price list lines.</p><p><br></p></td></tr><tr><td align="center"><i class="fa-bus">:bus:</i></td><td align="center"><p>All items should be assigned to the same <strong>vendor</strong>.</p><p><br></p></td></tr></tbody></table>

{% hint style="warning" %}
Virtual columns are highlighted in yellow in the mapping list and are always processed before the column-based values from the file. This is important if other fields depend on these values.
{% endhint %}

### 4. Copy and reuse

#### 4.1 Copy mapping

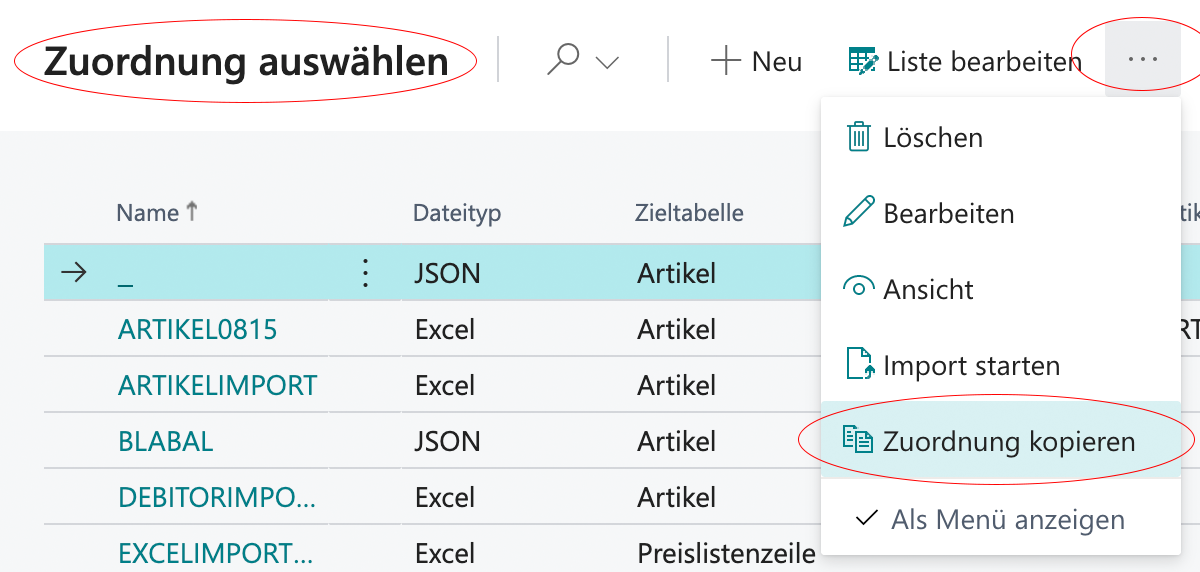
In the *"*[*Import mapping*](#id-1.-zuordnung-erstellen)*"* list select a mapping and choose the *“Copy Mapping”* action from the menu in the top-right corner (...) of the window. Enter a new name to create a complete copy including all settings and column mappings.

**Example use:** You create a basic mapping for your item import and copy it for slightly different scenarios such as a different price list or a different vendor file format. This saves time for recurring imports that are similar but not identical.

<div align="left" data-with-frame="true"><figure><img src="https://content.gitbook.com/content/QnKDhTKr7wRrsfjyv1Ev/blobs/ZcjsbJ5XJjRjc0fDxdfh/Bildschirmfoto%202026-03-31%20um%2010.52.00.png" alt="" width="375"><figcaption></figcaption></figure></div>

#### 4.2 Import directly from the list

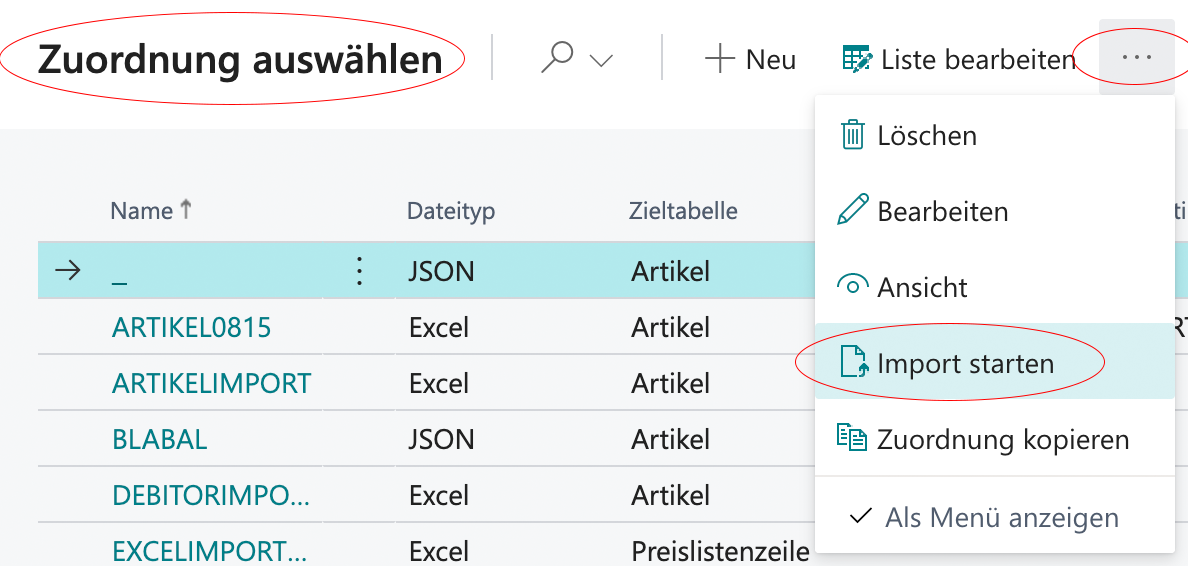
With *“Start Import”* you can jump directly from the mapping list to the *“Universal Import”* page, where the selected mapping is already preselected. This allows you to upload and import the file without any extra steps.

<div align="left" data-with-frame="true"><figure><img src="https://content.gitbook.com/content/QnKDhTKr7wRrsfjyv1Ev/blobs/cyimzzFIvsk2yHE812jE/Bildschirmfoto%202026-03-31%20um%2010.56.11.png" alt="" width="375"><figcaption></figcaption></figure></div>

#### 4.3 Reuse with Quick Import

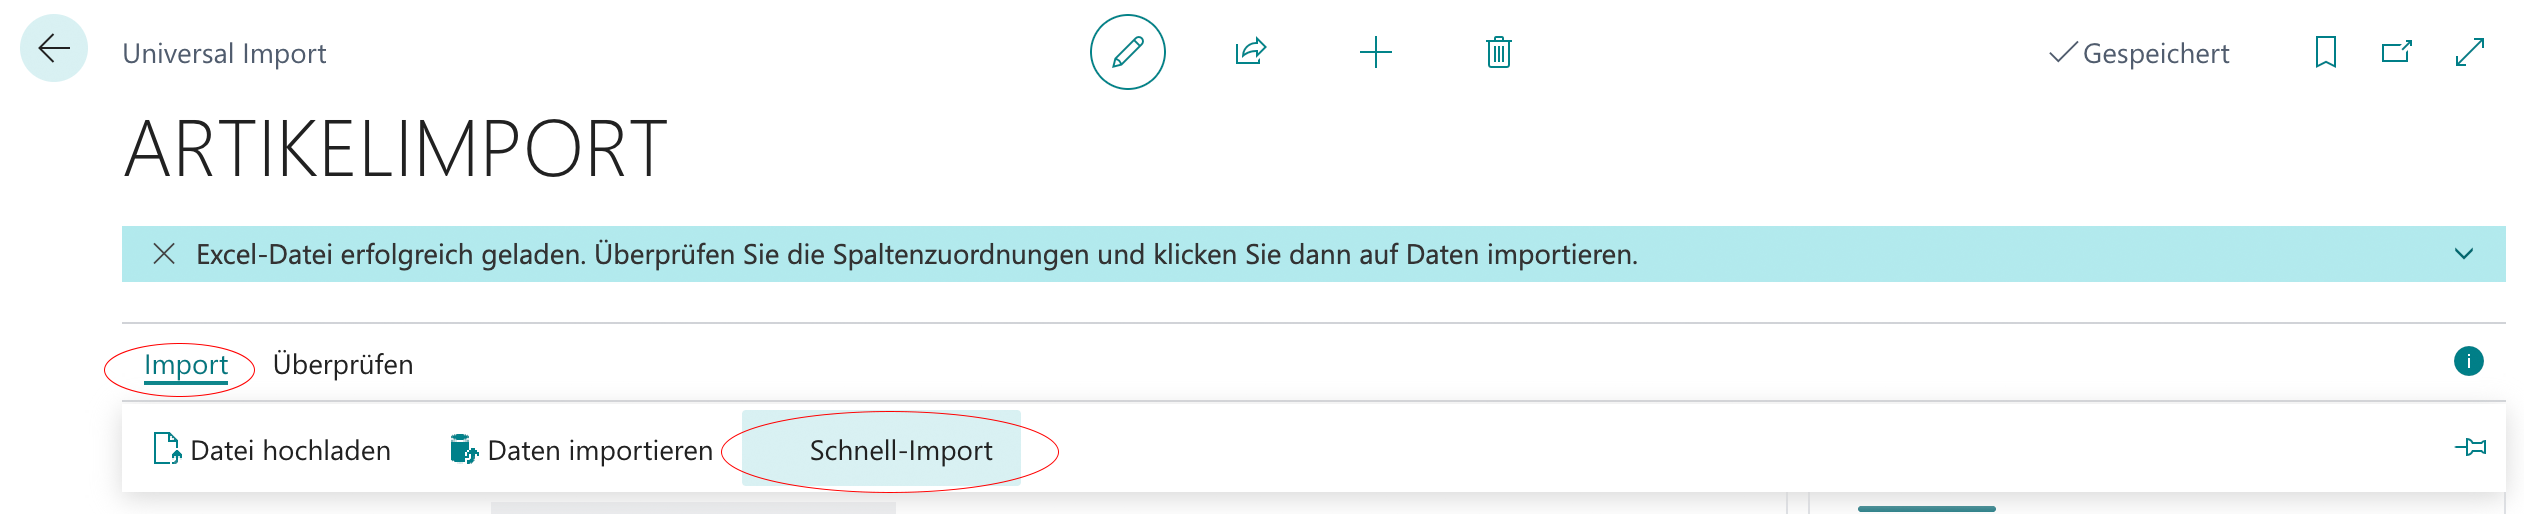
Once your mappings have been set up Quick Import is ideal for recurring imports. The system identifies the correct mapping by matching the file’s column headers with the saved mappings.

<div align="left" data-with-frame="true"><figure><img src="https://content.gitbook.com/content/QnKDhTKr7wRrsfjyv1Ev/blobs/t7oky0L1cGdSIaWbH7ci/Bildschirmfoto%202026-03-31%20um%2010.58.40.png" alt="" width="563"><figcaption></figcaption></figure></div>

{% hint style="info" %}
**Tip for partners**

Consulting partners, for example suppliers with price lists, can set up mappings professionally once and then hand recurring imports over to end users. These users can simply use **Quick Import** without having to configure the mapping again each time.
{% endhint %}


---

# Agent Instructions
This documentation is published with GitBook. GitBook is the documentation platform designed so that both humans and AI agents can read, navigate, and reason over technical content effectively. Learn more at gitbook.com.

## Querying This Documentation
If you need additional information that is not directly available in this page, you can query the documentation dynamically by asking a question.

Perform an HTTP GET request on the current page URL with the `ask` query parameter, and the optional `goal` query parameter:

```
GET https://docs.solutioo.de/universal-import/universalimport_en_us/step-by-step-guide/editor.md?ask=<question>&goal=<endgoal>
```

`ask` is the immediate question: it should be specific, self-contained, and written in natural language.
`goal` is optional and describes the broader end goal you are ultimately trying to accomplish on behalf of the user. GitBook uses it to tailor the answer towards what is most useful for that goal.

The response will contain a direct answer to the question and relevant excerpts and sources from the documentation.

Use this mechanism when the answer is not explicitly present in the current page, you need clarification or additional context, or you want to retrieve related documentation sections.