Basic settings
To access the Basic Settings, proceed as follows:
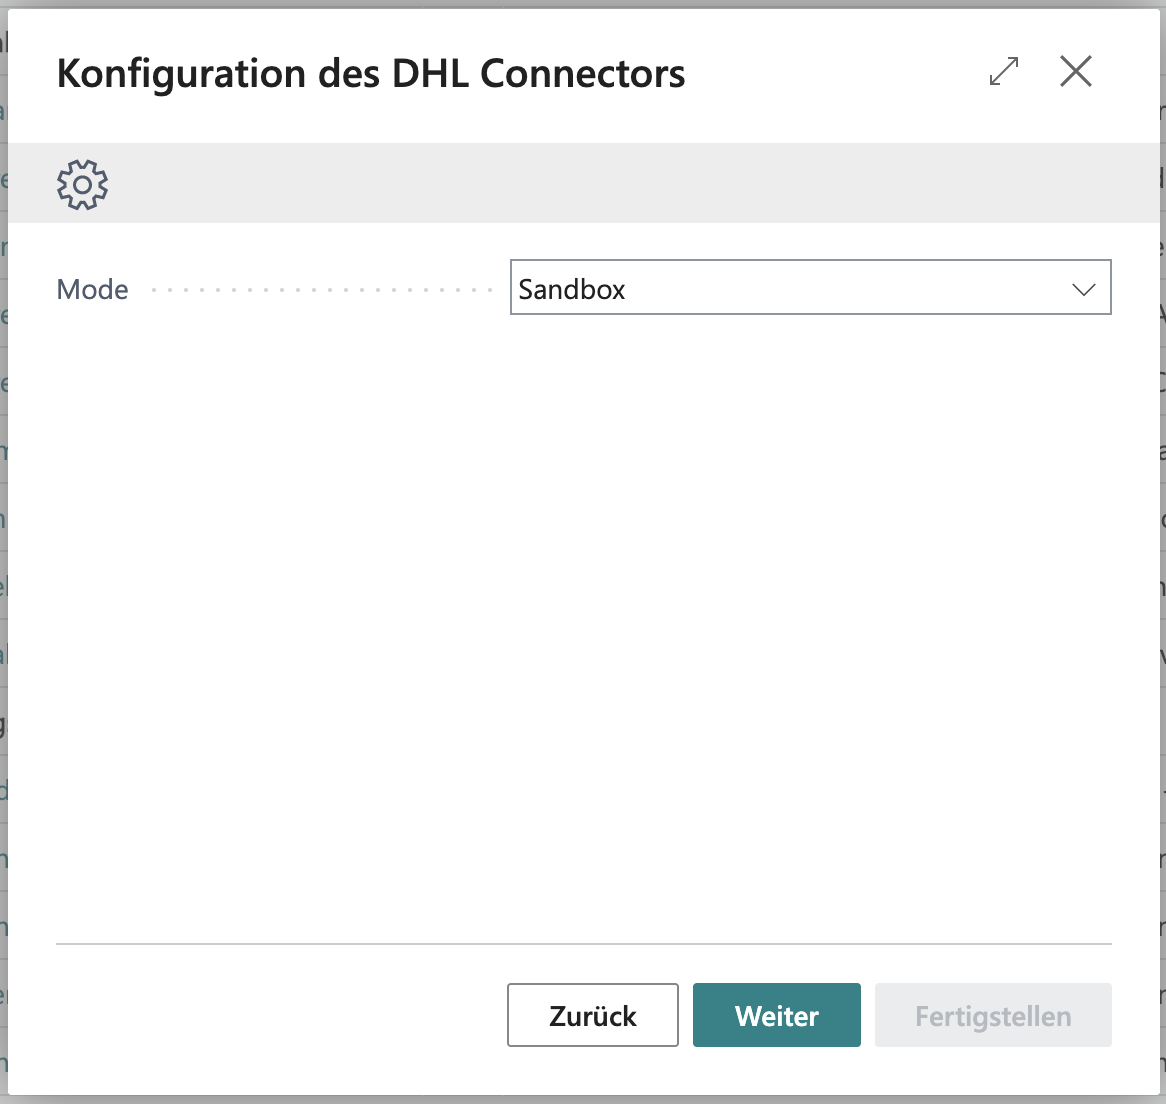
When you start the guided setup, a pop-up window will open. Here you’ll also find a reference to this documentation in case you encounter any questions or issues. Click “Next” to begin the actual setup process.
1. Mode Selection
In the first step, you can choose whether to start the connector in Live Mode or Sandbox Mode.


If you select Sandbox, entering your customer account data is not required.
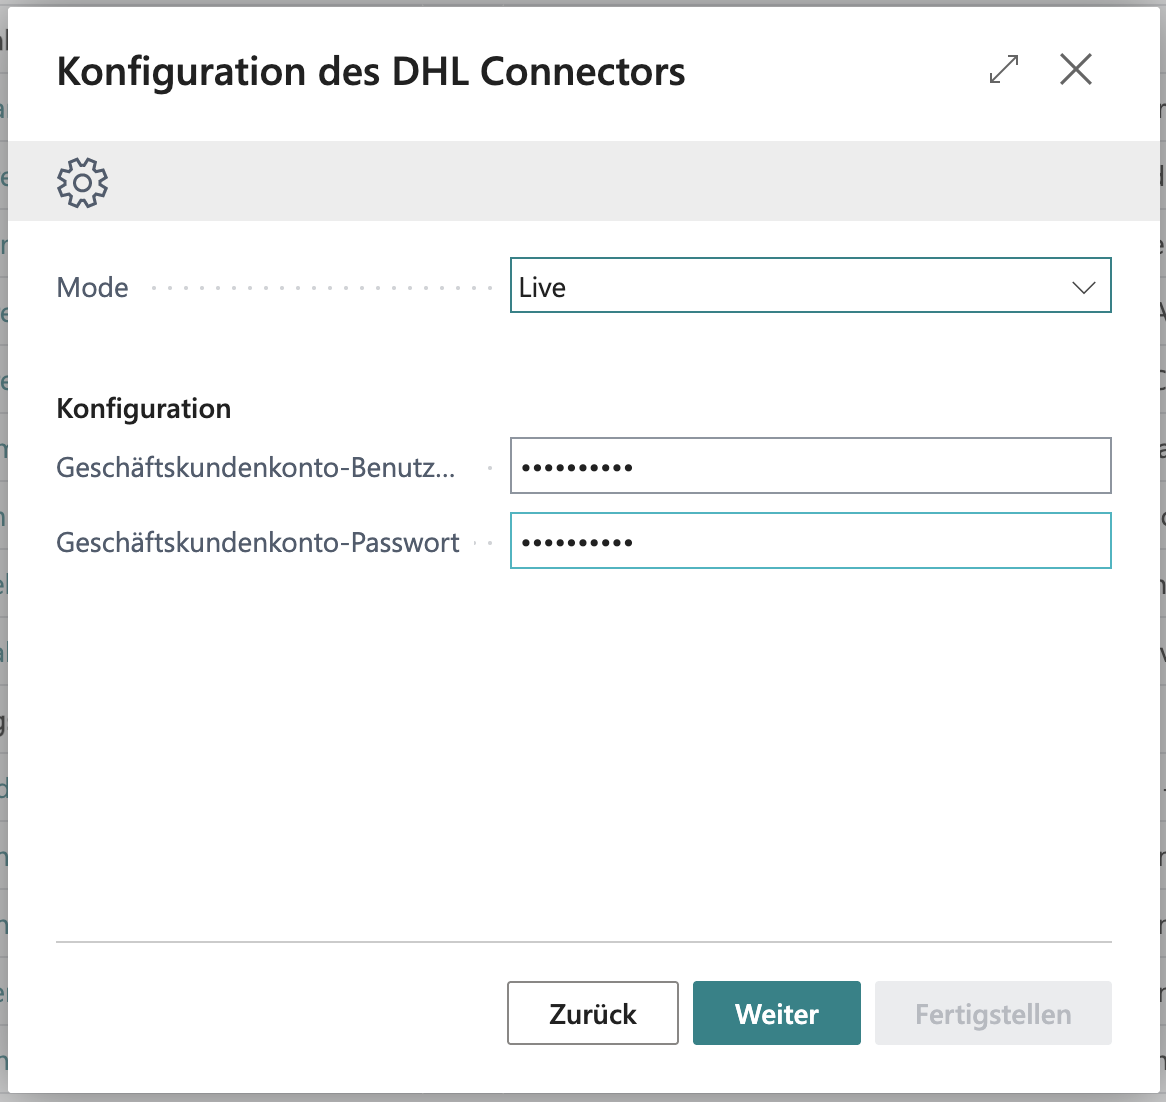
Only when switching to Live will an additional configuration screen appear, prompting you to enter your username and password for the DHL Business Customer Portal.
To avoid input errors, copy your username and password into a text document first, verify them, and then paste them into Business Central. Extra spaces before or after the input often cause errors.
After entering your data, click “Next” to continue.
2. Sender Data
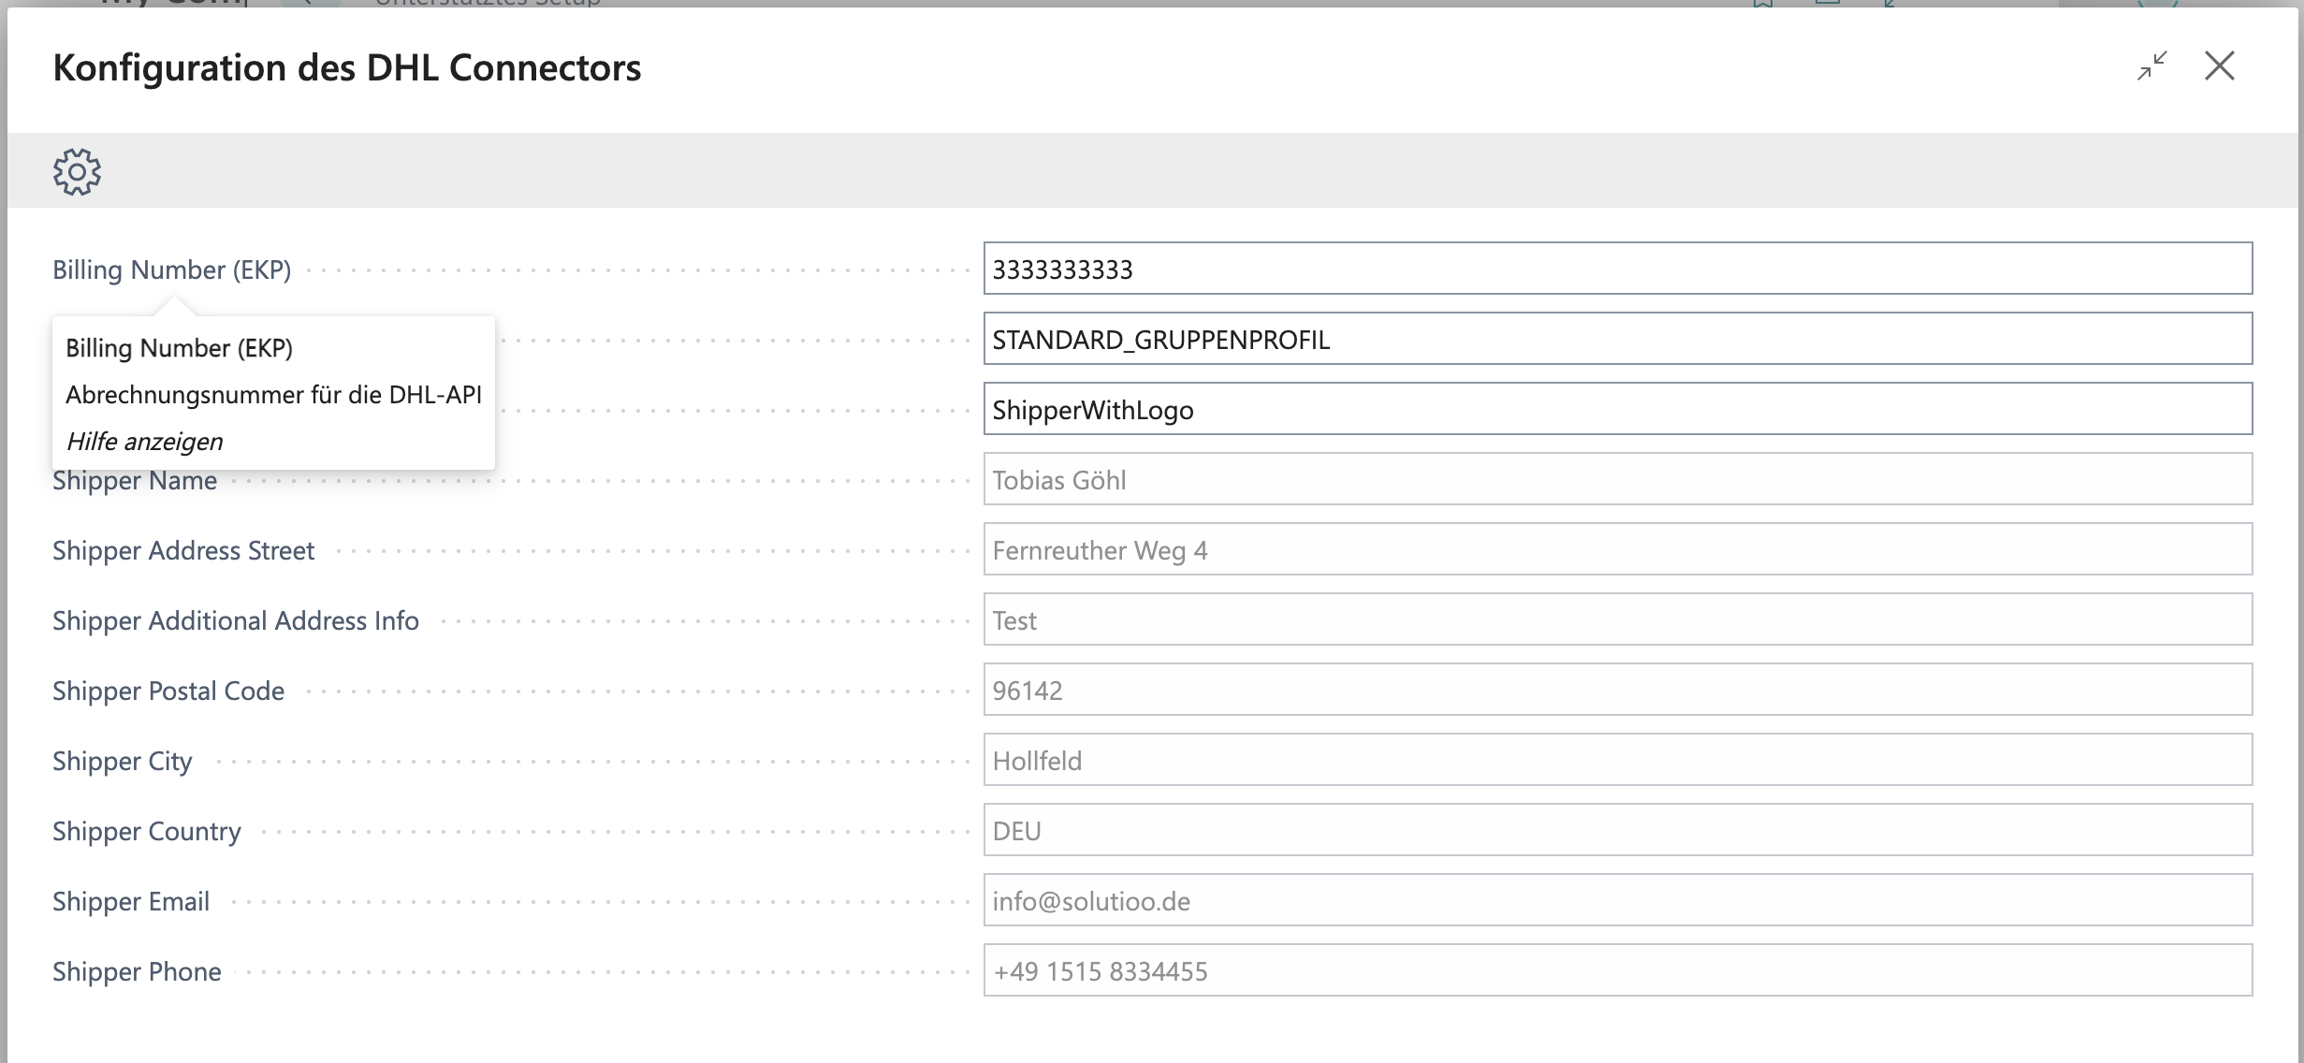
In the second step, you’ll be asked to provide your sender information. It’s best to maximize the pop-up window by clicking the “Expand” icon in the top-right corner (next to “Close”) so that all rows are clearly visible.

Hovering over each field label displays additional information.
Billing Number (EKP)
Enter the billing number from your DHL Business Customer Portal, which can be found in the Billing Center. The EKP number always consists of 10 digits — therefore, omit the last four digits of your billing number. If you’re using Sandbox Mode, you can leave the default value 3333333333.
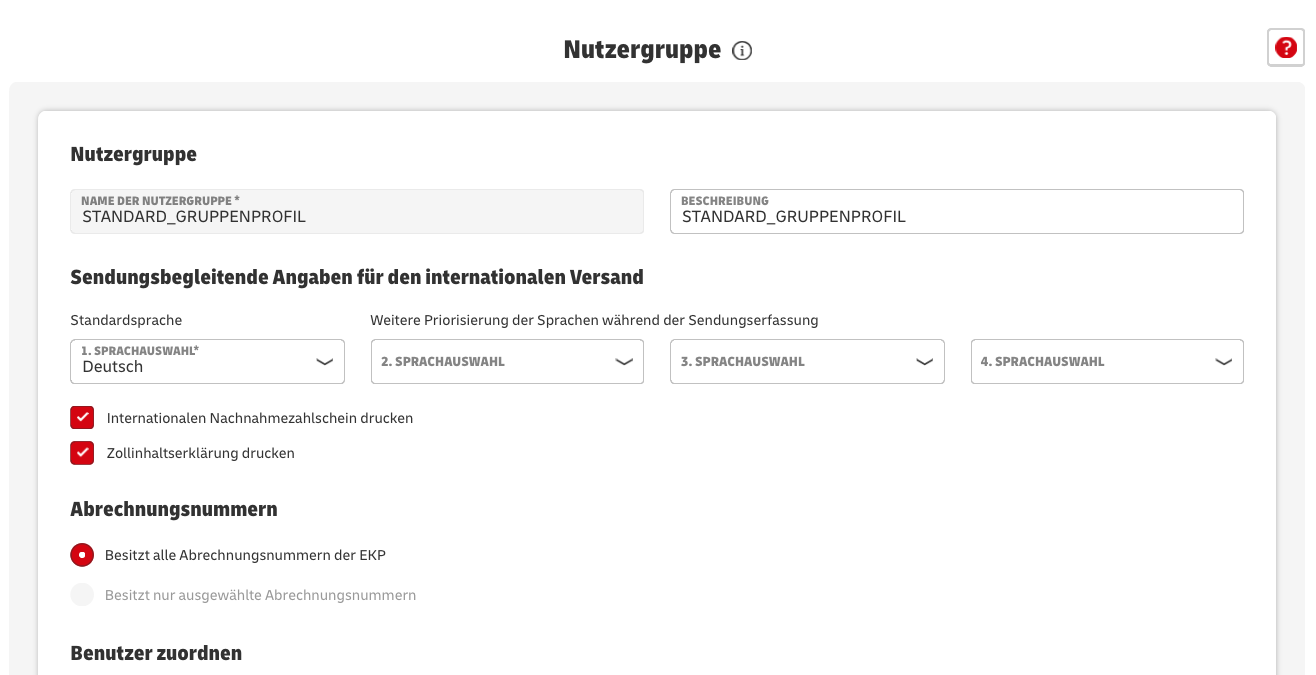
Profile Name
This corresponds to the user group defined in your DHL Business Customer profile. Example:

Shipper Reference
The Shipper Reference is used if you have defined a sender reference in your DHL Business Customer Portal and want to use that name as the shipper reference. If you specify this, the sender details below cannot be set within the connector and must be managed directly in the DHL portal. If you leave the shipper reference field empty, you must complete the following sender fields manually. You can find your shipper reference under Parcels & Goods > Templates > Shipment Creation in your DHL Business Customer Portal. Make sure to enter the template name exactly as it appears there.
Shipper Name
The name of the sender displayed on shipping labels.
Shipper Address Street
The sender’s street address displayed on shipping labels.
Shipper Additional Address Info
Additional address information. This field must not be empty!
Shipper Postal Code
The sender’s postal code displayed on shipping labels.
Shipper City
The sender’s city displayed on shipping labels.
Shipper Country
The sender’s country displayed on shipping labels. Use the country code “DEU” instead of writing “Germany.”
Shipper Email
The sender’s email address displayed on shipping labels.
Shipper Phone
The sender’s phone number displayed on shipping labels.
3. Test the Connection
Once all fields are completed, click the “Test Connection” button to check your connection to DHL. If the test fails, review your entries carefully for typos or formatting errors.
4. Done!
Click “Next” and then “Finish” to complete the configuration.
Your DHL Connector setup is now complete and ready for use!
Last updated
